
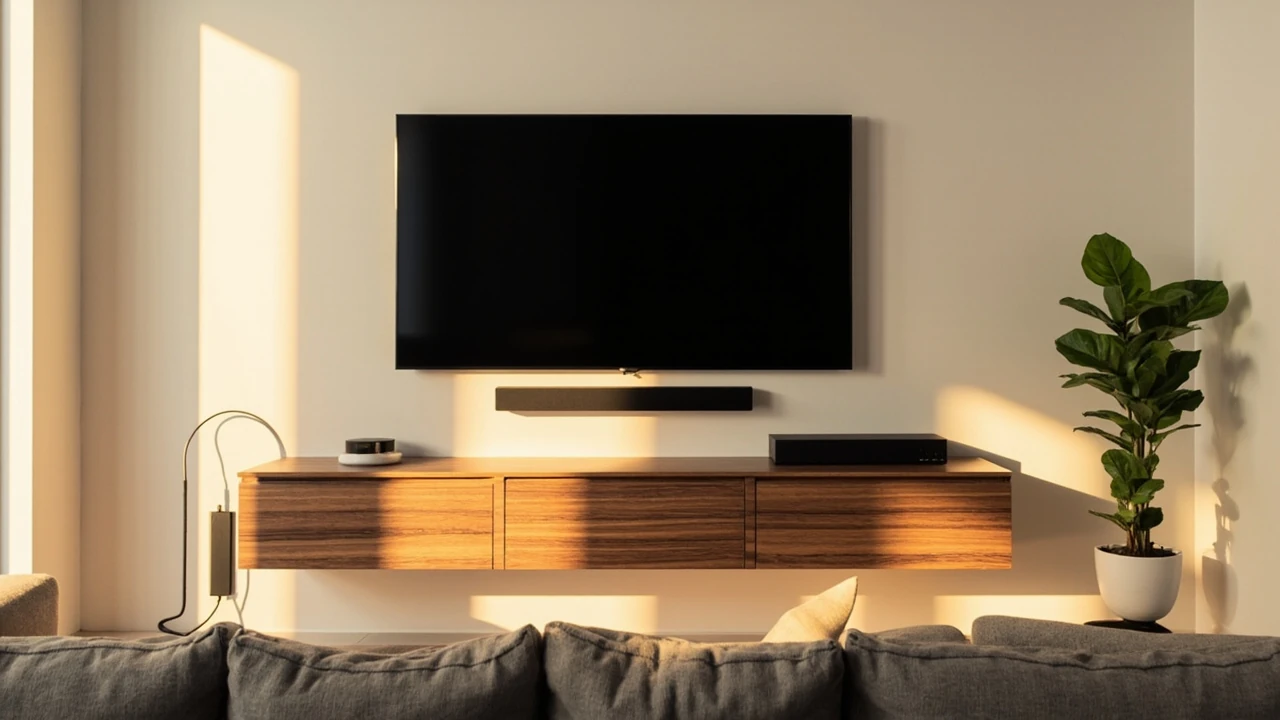
TV installation: a practical guide to wall mounting, wiring, and setup
Mounting a television on the wall looks simple in a fifteen-second video and rarely feels simple in real life. The screen arrives, the bracket is in the box, and the questions start: where do the studs actually sit, how do you hide the cables, what height keeps your neck comfortable, and is it safe to put a 75-inch display above a brick fireplace? A careful TV installation is less about drilling the first hole and more about a sequence of decisions that protect the wall, the screen, and the people sitting underneath it.
This guide walks through the practical side of a home TV installation from planning to final setup. The aim is to give you a clear order of operations, the trade-offs behind each choice, and the points where it makes sense to call a professional. The focus is on a permanent, tidy wall-mounted install rather than a temporary tabletop setup, because the wall-mounted case is where most of the real decisions live.
What “TV installation” actually covers
Homeowners use the phrase in three different ways, and the cost, tools, and skill level change a lot between them. Pinning down which one you mean keeps the project from drifting mid-day.
| Scope | What it includes | Typical skill level |
|---|---|---|
| Tabletop setup | Unbox, attach stand feet, plug in, connect streaming device, run software updates. | Beginner, no tools beyond a screwdriver. |
| Wall mount, surface wiring | Bracket install into studs or masonry, hang the screen, run power and HDMI down the wall on the surface in a paintable channel. | Comfortable with a drill, level, and stud finder. |
| Wall mount, concealed wiring | Same as above, plus a recessed power outlet, in-wall cable pass-through plates, or a true HDMI/power cable routed inside the wall cavity where code allows. | Intermediate to advanced, including electrical knowledge or a licensed electrician. |
| Full media build | Wall mount, concealed wiring, soundbar or surround system, source devices, network cabling, universal remote, and rack or console integration. | Often best handled by a custom installer. |
Most homeowners land in the middle row. The hardware and steps described below assume a wall-mounted TV with a clean cable path, but the principles also apply to a tabletop setup where the same decisions about height, viewing distance, and source organization show up.
Planning the TV installation before any holes are drilled
The most expensive mistakes happen before the drill comes out of the case. A short planning pass saves drywall, time, and the occasional cracked panel.
Pick the wall and the location carefully
Pick the wall by what you actually watch, not by what looks symmetrical in an empty room. The main viewing position should sit roughly opposite the screen, slightly off-axis if the room forces it, with no bright window directly behind the panel. Glare is the single most common reason a “perfect” TV installation feels uncomfortable in daily use. If a window is unavoidable, plan for blackout shades or a panel with strong anti-reflective coating.
Check the wall type before you commit. Standard wood-frame drywall is the easy case. Plaster and lath, brick, concrete, and metal studs each change the anchor strategy. A heavy 75-inch or 85-inch panel on a metal stud wall without a backing plate is a real safety risk, so verify what is behind the paint before buying a mount.
Decide on the mount type
The mount is the part of the TV installation that determines how the screen sits, tilts, and moves. Choosing it early prevents buying a bracket that fights the wall or the room.
- Fixed mount: sits the panel closest to the wall, looks the cleanest, and is the most forgiving on stud spacing. No tilt or swivel once installed.
- Tilting mount: drops the screen a few inches off the wall and angles it down, which helps when the TV sits above eye level, such as over a console or fireplace.
- Full-motion (articulating) mount: extends, swivels, and tilts. Useful for corner installations or rooms with multiple seating positions, but it adds weight, requires a wider stud span, and leaves more space behind the screen.
Match the mount’s VESA pattern (the hole pattern on the back of the TV) to the bracket spec, and confirm the weight rating with a margin. A bracket rated for 80 pounds holding a 65-pound screen is fine; the same bracket holding a 78-pound screen is not.
Sort out power and cable routing
Decide how power gets to the screen before you mount anything. Options range from a surface-mounted paintable cord channel to a recessed outlet behind the TV with a separate outlet near the floor. Running a standard extension cord inside a wall cavity is against electrical code in most jurisdictions, and it is a fire risk in every jurisdiction. If the plan involves hiding wires inside the wall, use an in-wall rated power kit, which is a code-compliant cable and plug assembly designed for this exact purpose, or have a licensed electrician add a recessed outlet.
List the cables that have to reach the screen: HDMI for sources, optical or HDMI ARC for audio, Ethernet if the network is wired, and possibly a USB cable for a streaming stick tucked behind the panel. One extra HDMI in-wall rated cable is cheap insurance for a future device.
Tools and materials for a clean TV installation
Gather the right tools once and the actual mounting takes under an hour for most panels. Rummaging through a toolbox with a sixty-five-inch screen balanced on a chair is how brackets end up crooked.
| Item | Why it matters | Notes |
|---|---|---|
| Stud finder | Locates wood studs behind drywall for a secure anchor. | Magnetic finders are reliable; electronic finders read wiring and plumbing too. |
| Drill and driver | Pilot holes and lag bolts into studs. | Use a bit slightly smaller than the bolt shank. |
| Level, ideally 4-foot | Keeps the screen straight across two studs. | A laser level helps for multi-screen or console-aligned installs. |
| Socket wrench or impact driver with socket | Tightens lag bolts to spec. | A 1/2-inch or 9/16-inch socket matches most mount hardware. |
| Tape measure and pencil | Marking and centering. | Measure twice, mark once. |
| In-wall rated cable kit | Code-compliant power and cable path inside the wall. | Includes a power bridge and brush-style wall plates. |
| Cable channel or raceway | Surface-mounted cable management. | Paintable versions disappear on white walls. |
| HDMI cables | Signal from sources to screen. | Ultra High Speed rated for 4K at 120Hz; longer runs need fiber HDMI. |
| Surge protector | Protects the panel and sources from voltage spikes. | Wall-mounted power kits rarely include surge protection. |
| Helper or panel lift | Lifts and aligns the screen onto the bracket. | A second pair of hands is the cheapest tool on this list. |
Step-by-step: how a TV installation actually goes
The order of operations below is the one installers tend to follow because each step makes the next one easier. Adjust for your specific wall and mount, but keep the order.
1. Mark the centerline and the screen height
Stand in the main viewing seat and have a helper hold the TV or a cardboard template of the same size on the wall. The center of the screen should sit roughly at seated eye level, which is about 42 to 50 inches from the floor for most living rooms. For panels mounted above a console or fireplace, lean toward the lower end of that range; tilted mounts allow higher placement without neck strain. Mark the top, bottom, and center of where the screen will go.
2. Find the studs and snap a level line
Use a stud finder to mark both edges of each stud behind the chosen span, then snap a level chalk line or draw a long level line across the marks. The mount’s vertical center should land on the stud centers, not the edges. If the bracket’s holes do not line up with the studs, a horizontal mounting plate that spans between two studs is the standard fix and most quality mounts include one.
3. Drill pilot holes and attach the wall plate
Hold the wall plate or mount base against the wall, double-check the level, and mark each bolt location through the bracket’s holes. Drill a pilot hole slightly smaller than the lag bolt shank at each mark, then drive the lag bolts into the studs with a socket wrench or impact driver. Snug, not forced: over-tightening strips the wood and weakens the anchor. Repeat for the other side and check the level again before moving on.
4. Prepare the cable path
Cut the holes for the cable pass-through plates, typically one behind the TV and one near the floor, and run the in-wall rated cables and power bridge between them. Brush-style wall plates give a clean look without the fishing skills of a true electrical rough-in. If the plan is surface wiring, measure the run from the TV down to the nearest outlet and cut the paintable channel to length.
5. Attach the bracket arms to the TV
Lay the screen face-down on a soft, flat surface such as a bed or the foam from the box. Screw the vertical arms to the back of the panel using the included spacers if the TV has a recessed VESA pattern. Do not overtighten; the screws bite into metal, and stripped VESA threads end a TV installation in expensive ways.
6. Hang the TV and make it level
With a helper, lift the screen and hook the bracket arms onto the wall plate. Most mounts click or lock into place with a small set screw at the bottom of each arm. Step back, eyeball the screen, and use the fine adjustment screws on the bracket to tilt or shift the panel until it sits level. This is the moment to fix small alignment issues, because they get harder to correct once the soundbar blocks the bottom edge.
7. Connect sources and tidy cables
Plug the power cable into the recessed outlet or surge protector, connect HDMI and audio cables to the sources, and bundle the slack behind the panel with hook-and-loop straps. Leave a small service loop so the TV can be lifted off the bracket without yanking a connector.
Viewing distance, height, and angle: the comfort side of a TV installation
A screen can be perfectly level and still be a pain to watch. Comfort comes down to a few repeatable numbers that work across panel sizes and resolutions.
- Viewing distance: a common rule of thumb is 1.2 to 1.6 times the screen’s diagonal for 4K panels, and 1.6 to 2.5 times the diagonal for 1080p. Closer than that and pixel structure becomes visible; further away and the picture starts to feel small.
- Eye line: the center of the screen should be at or slightly below seated eye height. A general ceiling is no more than 15 degrees above the natural sightline, which is why fireplace TVs work better with a tilting mount.
- Tilt: if the screen sits more than 20 inches above eye level, a 5- to 15-degree downward tilt reduces glare on the top of the panel and keeps reflections from ceiling lights out of the sweet spot.
- Side seating: for seats more than 30 degrees off-center, an IPS or wide-angle panel holds color better than a VA panel. OLED panels are excellent at angles but carry the usual burn-in caveats for static UI elements.
Common TV installation mistakes and how to avoid them
Most problems show up within the first month. A few habits prevent the most common ones.
- Anchoring only into drywall. Even with toggle bolts, drywall alone is a poor anchor for a large panel. Always hit wood studs, masonry, or a purpose-built in-wall backing plate.
- Skipping the in-wall rated cable kit. Standard HDMI and power cables behind drywall are a code issue in many areas and a heat risk where insulation is tight.
- Mounting into metal studs without the right hardware. Metal studs need specific snap-toggle or metal stud anchors, and a heavy panel usually wants a plywood backer board spanning several studs.
- Hiding a soundbar in the cable path. A soundbar that sits flush under the screen needs its own bracket, and the mount has to leave clearance for it. Plan the soundbar before the mount, not after.
- Forgetting the service loop. Without a few extra inches of slack, a future repair that requires lifting the TV off the bracket becomes a cable-straining exercise.
Sound, sources, and the rest of the TV installation
The picture is half of the experience. A wall-mounted TV installation usually means the built-in speakers point into the wall and the room, which sounds thin at anything above casual viewing volume. Three common upgrades keep the audio matched to the screen.
- Soundbar with HDMI ARC or eARC. A single cable carries audio from the TV to the bar, and the bar’s remote or the TV’s remote can control volume. eARC adds support for lossless audio formats from a compatible source.
- Powered 2.1 system. A stereo pair plus a subwoofer covers most living rooms. Place the speakers at the outer edges of the screen and toe them in toward the main seat.
- Full surround or Atmos setup. Worth it for a dedicated media room, less so for an open-plan living space where ceiling height and reflective surfaces fight the effect.
Source organization matters as much as the speakers. A streaming stick, game console, and cable box all need HDMI ports, power, and a place to live. Two small shelves behind the console or a compact rack with a wired network drop keep heat and cables out of sight. If the install includes a lot of sources, an HDMI switch with remote control reduces the daily reach for the back of the TV.
When a professional TV installation is the right call
There is no shame in handing the drill to a pro. The economics usually make sense when the project involves any of the following:
- Brick, concrete, or stone walls that need masonry bits and specialty anchors.
- Plaster and lath walls where anchors behave unpredictably and patching mistakes is expensive.
- Recessed electrical outlets, especially in older homes without a clear circuit map.
- Heavy panels above 75 inches, where the panel is awkward to lift and the consequences of a bad mount are serious.
- Fireplace mantels or stone surrounds that need a mantel-mount system rather than a standard wall plate.
Many retailers and ISPs include a basic TV installation with a large-screen purchase, but the included service usually covers a wood-stud drywall mount with surface wiring. If the plan is concealed wiring, masonry, or above a fireplace, a custom installer or licensed electrician is the safer bet. For homeowners weighing a larger project such as rewiring or a remodel, the same planning skills show up in Furnace Installation: What Homeowners Should Know First, which covers the same kind of pre-work decisions in a different trade.
Cost, time, and what affects both
Costs vary widely by region, but a few patterns hold. A basic wall mount with surface wiring runs an hour or two for a confident DIYer and costs mostly in tools and a bracket. A concealed-wiring install with an in-wall power kit adds the cost of the kit, a couple of hours of careful work, and patching if the wall plates are not perfectly sized. A professional install with concealed wiring, masonry, or above-fireplace work tends to price by the panel size and the wall type, and most installers provide a quote after a quick site look or a photo of the wall.
| TV installation scenario | Typical time | What drives the cost |
|---|---|---|
| Tabletop setup, no mount | 30 to 60 minutes | Stand assembly, software updates, source connection. |
| Wall mount, surface wiring, wood studs | 1.5 to 3 hours | Mount quality, panel size, helper availability. |
| Wall mount, concealed wiring, in-wall power kit | 2.5 to 5 hours | Wall type, fishing cables, patching and paint touch-up. |
| Masonry or stone wall | 3 to 6 hours | Masonry bits, specialty anchors, possible core drilling for cable pass-through. |
| Above a fireplace, mantel mount | 3 to 6 hours | Mantel mount system, heat clearance, sometimes electrical work. |
| Pro install with full media build | Half day to full day | Number of sources, surround wiring, rack or console integration. |
Frequently asked questions
How high should a TV be mounted on the wall?
For a seated living room, the center of the screen should sit roughly 42 to 50 inches from the floor, which lines up with seated eye level. If the screen has to go higher because of a console or fireplace, a tilting mount keeps the picture at a comfortable angle without forcing a sore neck.
Can I mount a TV on drywall without studs?
It is not recommended for anything beyond a small, light screen. Toggle bolts spread the load across a wider area of drywall, but a large panel is a real safety risk on drywall alone. For heavier TVs, hit the studs or use a plywood backer board that spans multiple studs.
Do I need an electrician for a TV installation?
If the plan is surface wiring with the existing outlet, no. If the plan is a recessed outlet behind the TV, the answer is usually yes, especially in older homes where the circuit capacity and wire condition matter. An in-wall rated power kit is a code-compliant middle ground for many installs.
What is the difference between fixed, tilting, and full-motion mounts?
A fixed mount sits the panel closest to the wall and does not move. A tilting mount lets the screen angle down, which is useful for higher placements. A full-motion mount extends and swivels, which helps with corner walls or multiple seating positions but adds bulk and weight behind the screen.
How do I hide TV cables without opening the wall?
A paintable surface-mounted cable channel runs from behind the TV down to the nearest outlet or console. It is the simplest option, takes about an hour, and disappears on a white wall once it is painted. The trade-off is that the channel is visible up close.
What size TV should I buy for my room?
Match the screen size to the seating distance, not the wall. A common starting point is 1.2 to 1.6 times the diagonal for 4K screens, so a 65-inch panel feels right at about 6.5 to 8.5 feet of viewing distance. Larger is fine in a dark room; smaller is better in a bright room with lots of reflections.
Is it safe to mount a TV above a fireplace?
It can be, with a few conditions. A mantel mount keeps the screen lower and cooler, and the fireplace should be a sealed, direct-vent unit rather than an open wood-burning hearth that sends heat up the wall. Confirm the manufacturer’s clearance specs and never recess the TV into a combustible mantel.
How long does a TV installation take for a beginner?
A simple wood-stud wall mount with surface wiring takes most beginners two to three hours, including setup and cable management. Concealed wiring, masonry, or a heavy panel can stretch the same project to a full day, which is often the point at which a professional starts to make financial sense.
Can I reuse my old wall mount for a new TV?
Usually, if the VESA pattern matches and the weight rating still covers the new panel. A mount that handled a 50-inch screen may not be rated for an 85-inch screen even if the hole pattern lines up. Check both numbers before trusting the old bracket.
Do I need a special HDMI cable for a wall-mounted TV?
For most 4K sources, an Ultra High Speed HDMI cable is enough. For runs longer than about 25 feet, especially through a conduit in the wall, an active or fiber HDMI cable keeps the signal clean. The cable rating matters more than the brand.
Bringing it together
A clean TV installation is mostly a planning project that happens to use a drill. Decide where the screen will live, what the cable path looks like, and how the panel gets power before buying a mount. Confirm the wall type, hit the studs, use an in-wall rated cable kit if the wires are going behind drywall, and leave a small service loop so the screen can come down for service. For complex walls, masonry, or above-fireplace work, a licensed installer or electrician is worth the visit fee, and the same logic shows up in Attic Fan Installation: Is It Actually Worth It? where the wall, the wiring, and the venting all have to be right at the same time. Get those decisions made in advance, and the rest of the day is straightforward.



Leave a Reply