
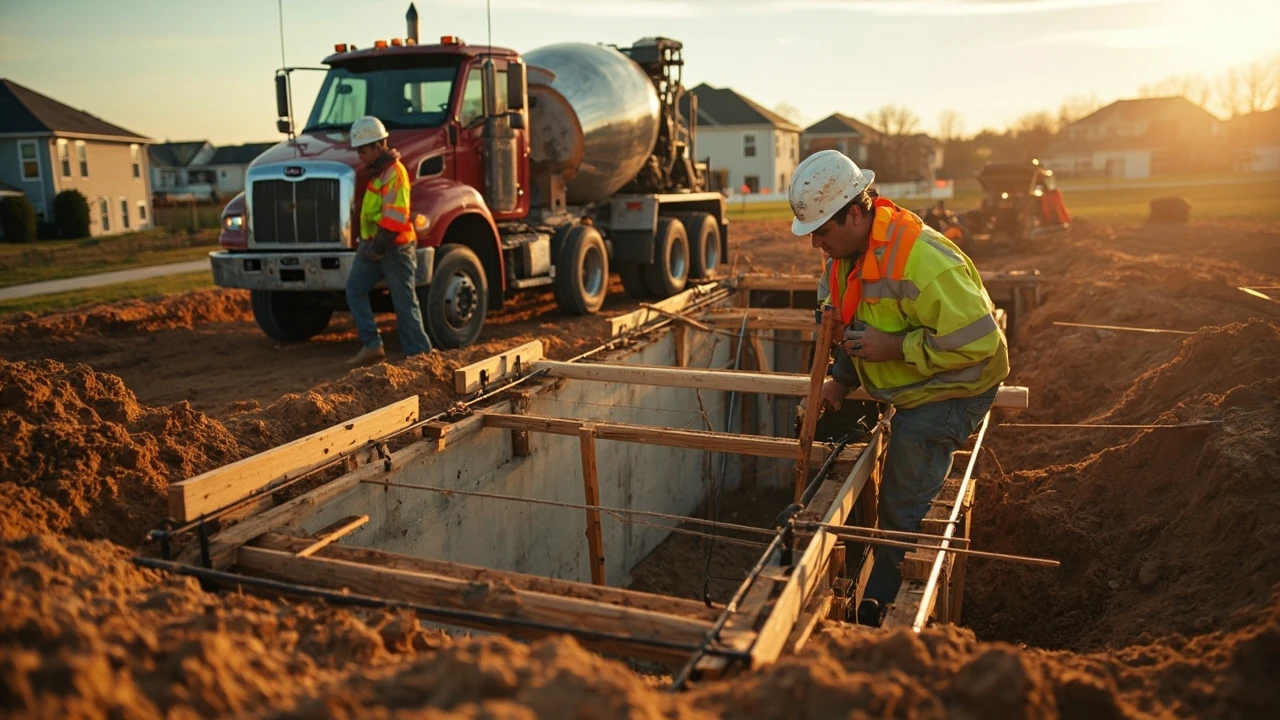
Foundation installation: choosing a method that fits your soil, climate, and budget
A foundation is the first structural decision a home makes, and it is the hardest one to undo. Long before walls go up or a roof is framed, the ground beneath the house has to carry every load, resist every freeze-thaw cycle, and stay dry enough to keep the living space above it usable. Most homeowners only think about foundation installation when something goes wrong: a crack in the basement wall, a floor that slopes toward the center, doors that start sticking in a frame that used to close cleanly. By that point, the choices that shaped those problems were made months or years earlier, often with very little input from the people paying for them.
This guide walks through what foundation installation actually involves, how the major methods differ, and what to weigh before signing a contract or breaking ground. The goal is not to push any one system. Slabs, crawlspaces, full basements, and pier-and-beam frames each have a real place in residential construction, and the right answer depends on the site, the climate, and the long-term plan for the house.
What foundation installation really covers
Foundation installation is the process of building the structural base that transfers a building’s loads into the ground. In residential work it usually means one of four things:
- A monolithic or stem-wall slab poured directly on a prepared grade
- A crawlspace built on short foundation walls, typically 18 to 48 inches deep
- A full basement, which adds usable square footage at the cost of more excavation and waterproofing
- A pier-and-beam system, where the structure rests on discrete footings or driven piles
Each of these is a different way of solving the same problem: keep the wood framing above the ground, distribute the weight of the house across stable soil, and keep groundwater away from living space. The decision is partly structural and partly financial. A slab is cheaper in mild climates but expensive to add plumbing or ductwork to later. A basement costs more up front but gives you a finished floor at the price of an unfinished one. A crawlspace is a compromise that can work very well when it is properly vented and insulated, and very badly when it is not.
Common foundation installation methods at a glance
The table below summarizes the methods most homeowners encounter. Costs are regional and shift with material prices, but the relative differences tend to hold over time.
| Method | Typical depth | Best climate | Relative cost | Main advantage | Main limitation |
|---|---|---|---|---|---|
| Monolithic slab-on-grade | Shallow (one continuous pour at grade) | Warm, stable soils | Lowest | Fast, single pour, fewer cold joints | Limited access for plumbing or HVAC later |
| Stem-wall slab | Shallow with a raised perimeter footing | Mild to moderate climates | Low to moderate | Better frost protection than a true monolith | Still shallow; vulnerable to expansive soils |
| Crawlspace | Shallow (18 to 48 in) | Moist climates where slab moisture is a concern | Moderate | Easy access to mechanicals | Ventilation and moisture control must be designed in |
| Full basement | Full height (often 8 ft or more) | Cold climates with deep frost lines | High | Adds usable square footage | Excavation, waterproofing, and egress requirements add cost |
| Pier and beam | Varies; footings or driven piles | Coastal, flood-prone, or poor-soil sites | Moderate to high | Lifts the house above flood level or weak soils | Requires skirting and careful moisture management |
When you look at a foundation in person, what you see is mostly the wall. What matters most is the work underneath: how the soil was tested, how the footings were sized, what the drainage looks like, and how the slab or wall meets the ground. Those details drive long-term performance far more than the material choice itself.
Site and soil: the decisions that come before any concrete is poured
Before a foundation installation method is even chosen, the site has to be evaluated. Builders who skip this step tend to be the ones explaining cracks a few winters later. Three site-specific factors carry the most weight.
Bearing capacity and soil type
Soils are not all equal. A clean, dense sand can carry several thousand pounds per square foot. A soft clay might carry only a fraction of that, and a layer of organic topsoil carries almost nothing at all. A geotechnical engineer or a qualified soils lab can run a simple bearing test and produce a report that tells the designer how wide the footings need to be. On a small project this is sometimes skipped, which is usually fine on a known, well-behaved lot. On a lot with fill, a high water table, or a history of slope movement, the report is not optional.
Frost depth and freeze-thaw behavior
In cold climates, foundation installation has to push footings below the local frost line, the deepest point that groundwater is expected to freeze in an average winter. In much of the northern United States that means three or four feet of excavation before any concrete is even formed. If the footings sit above the frost line, the soil heaves under them as it freezes, and the house above moves with it. One bad winter is enough to crack a slab, snap a water line, or rack a door frame.
Water table and drainage
A high water table or a slope that channels runoff toward the house will find every weakness in a foundation wall. Drainage design is not a finishing touch. Perimeter drains, graded soil that slopes away from the house, and downspouts that discharge well clear of the foundation are part of the same system as the wall itself. A well-built basement in poor drainage is a chronic problem. A modestly built basement in good drainage can stay dry for the life of the house.
Slab-on-grade foundation installation, step by step
Slabs are the workhorse of warm-climate residential construction. They are quick to build, relatively inexpensive, and they work well on stable, well-drained soils. A For additional context, typical slab-on-grade foundation installation follows a clear sequence.
- Layout and excavation. The house footprint is staked, topsoil is stripped, and the pad is cut or filled to rough grade. A slight over-excavation gives the crew room to install forms and perimeter insulation.
- Utilities rough-in. Any plumbing that runs under the slab is pressure-tested and laid in place before the gravel goes down. This is the moment to add a radon vent pipe if the local geology suggests it is needed.
- Gravel base. A layer of compacted crushed stone, usually 4 to 6 inches, provides a capillary break between the soil and the slab. Without it, moisture wicks up through the concrete and can damage flooring or finish materials.
- Forms, insulation, and vapor barrier. Forms are set to the finished slab height. Rigid foam is placed at the edges where local code requires it, and a polyethylene vapor barrier covers the gravel.
- Reinforcement. Steel rebar or welded wire mesh is placed on chairs so it sits in the middle of the slab, not on the ground. Concrete is strong in compression but weak in tension, and the steel carries the tensile loads that the concrete alone cannot.
- Pour and finish. The concrete is placed, vibrated to consolidate it around the reinforcement, screeded flat, and finished with a trowel or a broomed texture depending on whether the floor will be covered or exposed.
- Cure. The slab is kept moist and protected for several days. Proper curing is what gives concrete most of its strength; letting it dry out in the first 48 hours is one of the most common causes of surface dusting and cracking.
Once the slab has cured, framing can begin. Trades that need to come back later, such as electricians running conduit in a slab, generally have to coordinate their work before the pour. After the concrete sets, the only access to anything beneath it is a jackhammer.
Basement foundation installation, step by step
A basement is a slab-on-grade with deeper walls and a deeper excavation. That is a slight oversimplification, but it captures the difference. The real complexity of a basement lies in keeping it dry for decades.
- Excavation. The hole is dug below the planned basement floor elevation, with enough working room around the perimeter for forms and waterproofing crews.
- Footings. Concrete footings, typically 16 to 24 inches wide and 8 to 12 inches thick, are poured at the base of the wall. They spread the load of the house across enough soil to keep bearing pressures within safe limits.
- Wall construction. Basement walls are usually poured concrete, concrete masonry units (CMU), or insulated concrete forms (ICFs). Each has trade-offs in cost, insulating value, and how easily finishes can be applied later.
- Waterproofing and drainage. A waterproofing membrane or damp-proofing is applied to the exterior of the walls. A perforated drain pipe is set beside the footing, bedded in gravel, and routed to daylight or a sump basin.
- Backfill. Once the walls have cured and the drainage system is in place, the excavation is backfilled. The top of the backfill should slope away from the house, and the surface should be finished with a topsoil layer that supports a planted lawn or a swale.
- Slab pour. The basement floor is poured inside the walls, typically on a gravel base with a vapor barrier underneath.
A poured wall and a CMU wall of the same dimensions perform similarly when they are built correctly. The differences show up in the details: how straight the wall is, how well the joints are filled, how the penetrations for pipes and conduits are sealed. For most homeowners, the choice comes down to local labor availability and the contractor’s familiarity with one system or the other.
Crawlspace foundation installation, step by step
A crawlspace is a short perimeter wall on footings, with the floor of the space either left as bare soil or covered with a vapor barrier. It is the right answer on sites where a full basement is not justified, where the water table is high, or where easy access to plumbing and wiring matters more than extra square footage.
- Excavation and footings. The crawlspace is shallow, but the same footing principles apply. Footings should sit below the frost line even for a short wall, because frost heave under a footing will lift the wall and the floor above it.
- Short foundation wall. The wall is built up to the height of the first floor framing. Common materials are CMU, poured concrete, and treated wood in some regions.
- Vapor barrier on the ground. Bare soil in a crawlspace is a moisture source. A continuous polyethylene vapor barrier, sealed at the seams and weighted down, dramatically reduces the amount of water vapor that rises into the house.
- Ventilation or sealing.
- Access. A crawlspace needs an access point large enough for a person and for any equipment that might need to come in later, including a water heater replacement or a new HVAC air handler.
Older code treated crawlspaces as vented spaces, with openings in the foundation wall to let moisture escape. Modern practice in many regions moves toward sealed, conditioned crawlspaces, where the space is treated as a shallow basement and insulated at the perimeter.
The condition of a crawlspace is something most homeowners never see, which is exactly why problems there tend to be severe before they are noticed. A quick visual check once a year, with attention to standing water, insulation that has fallen, and any musty odor, catches most issues early.
What foundation installation actually costs
Costs shift with region, soil, and labor markets, so any specific number has a shelf life. The ranges below are typical for the United States and are useful for comparison rather than for budgeting a specific project. Material prices in particular move with commodity markets, and labor costs vary widely by metro area.
| Foundation type | Typical cost per square foot (installed) | Notes |
|---|---|---|
| Monolithic slab | About $4 to $8 | Lowest option; cost depends on slab thickness, reinforcement, and site prep |
| Stem-wall slab | About $5 to $10 | Adds a perimeter footing below the slab for frost protection |
| Crawlspace | About $7 to $12 | Includes short walls, footings, and a vapor barrier |
| Full basement (unfinished) | About $15 to $30 | Excavation, footings, walls, slab, waterproofing, and drainage |
| ICF basement walls | About $20 to $35 | Higher material cost offset by built-in insulation and faster build |
| Pier and beam (new construction) | About $10 to $20 | Cost depends heavily on number of piers and pile depth |
A poured concrete mix itself is a relatively small share of the total cost. The bigger drivers are excavation, forming, labor, waterproofing, and the work that happens after the wall is up but before the contractor leaves the site. A foundation is one of the line items where cutting corners shows up years later as a repair bill.
Common foundation installation problems and how to prevent them
Most foundation problems are not mysterious. They are the result of one of a small number of decisions made before or during construction. Working through this list with a contractor before the work starts is a good use of an hour.
- Footings above the frost line. The single most common cause of foundation movement in cold climates. Confirm the local frost depth with the building department and make sure the footings go below it.
- Poor drainage around the house. Soil that slopes toward the foundation, downspouts that empty next to the wall, and missing perimeter drains all push water toward the structure. Grade the site so water moves away, and run downspouts at least 6 to 10 feet clear of the foundation.
- Skipping the vapor barrier. Under a slab or on a crawlspace floor, a missing or torn vapor barrier lets soil moisture migrate into the house. Cheap to install during construction, expensive to retrofit.
- Backfill too soon. Backfilling against a freshly poured wall before it has cured can crack the wall or push it out of plumb. Most specs require at least a week of cure time, longer in cool weather.
- Untreated penetrations. Every pipe, conduit, or anchor bolt that passes through a foundation wall is a potential water path if it is not sealed. These are the small details that decide whether a basement stays dry for decades.
- Inadequate reinforcement. Slabs without rebar or with rebar placed directly on the ground lose much of their tensile strength. Chairs that hold the steel in the middle of the pour are not optional.
A useful exercise before signing a contract is to ask the builder, point by point, how each of these issues will be handled on this specific site. The answers are often more revealing than the price.
How long does foundation installation take
For a typical single-family home, the foundation phase runs from a few days to a few weeks, depending on the system and the weather. A simple slab on a flat, accessible lot can be formed, poured, and cured enough for framing in a week. A full basement on a tight urban lot with poor access and a wet spring can take three to four weeks before the slab is ready to receive the framing crew. Two factors drive most of the schedule:
- Weather. Concrete cannot be placed on frozen ground, in standing water, or during heavy rain. Excavation also stops in saturated soil for safety reasons. Crews build weather days into the schedule, but a stretch of bad weather can push the timeline by a week or more.
- Inspection. Footings, foundation walls, waterproofing, and drain tile are all inspection points. Inspections are usually quick, but a missed call or a backlog at the building department can idle a crew for a day or two.
One thing worth knowing: the foundation phase is one of the hardest to compress. Adding more crew does not speed up concrete curing. Planning a realistic schedule with the builder, including a couple of weather days, is a small investment that pays off in less stress later.
Choosing a foundation installation contractor
Foundation work is not the place to pick the lowest bid without reading it. The skill of the crew shows up in the details that are hard to see from the street: how straight the forms are, how well the waterproofing is lapped, how clean the drain tile is before it is buried. A few questions that help separate the careful contractors from the careless ones:
- Who is doing the work, and how much of it is in-house versus subcontracted? A foundation crew that works together regularly is usually more consistent than one assembled for a single project.
- What waterproofing system do you use, and what warranty comes with it? Manufacturer-backed warranties are a useful signal, but read what they actually cover and what they exclude.
- How do you handle changes in soil conditions during excavation? The honest answer is that a price gets adjusted when conditions change. The dishonest answer is a flat number that ignores the ground entirely.
- Can you walk me through the inspection sequence and what happens at each step? A contractor who can explain the process clearly is usually one who has done it many times.
- What does the backfill schedule look like, and how will the site be graded when you are done? Backfill and final grading are the parts of the job that shape how the foundation performs once the house is occupied.
Local references matter. Foundations are heavily influenced by local soil and climate, and a crew that has poured hundreds of foundations in the same county will know things a national contractor will have to look up.
Climate, code, and the limits of general advice
Foundation installation is unusually sensitive to local conditions. Building codes set minimums for footing depth, wall thickness, reinforcement, and waterproofing, and they are usually a sensible starting point. Going below code is a bad idea, and going significantly above code costs money that does not always come back at resale. The bigger gains usually come from doing what the code requires well, and from spending on the few upgrades that are clearly worth it in a given climate:
- More rigid foam under and around the slab in cold climates
- Better waterproofing on basement walls in wet climates
- A sealed, conditioned crawlspace in humid regions rather than a vented one
- Deeper footings on expansive clay soils, even where the local frost line would suggest shallower ones
None of these are universally correct. They depend on the site, the climate, and the house. A good contractor tailors the foundation to the lot, not the other way around.
Frequently asked questions
How deep should a foundation be for a house?
In warm climates with no frost, a slab or shallow crawlspace can sit just below the topsoil. In cold climates, footings must extend below the local frost line, which can be three to four feet or more in the northern United States. The building department for your county or city will publish the required depth, and that is the starting point.
What is the cheapest type of foundation installation?
A monolithic slab-on-grade is usually the least expensive option in regions where the climate allows it. It requires the least excavation, no tall walls, and a single concrete pour. The trade-off is limited access for plumbing and ductwork, and the risk of cracking in cold or expansive-soil regions.
How long does a concrete foundation take to cure?
Concrete reaches most of its design strength in about 28 days, but it is usually workable for framing within a few days. Formwork on walls is often stripped after 24 to 48 hours. Slabs are often walked on the next day and framed on within a week, depending on the mix and the weather.
Do I need a soil test before foundation installation?
On a small, well-known residential lot in a stable area, many builders skip a formal soils report and rely on local experience. On a lot with fill, a high water table, or unusual terrain, a soils report is well worth the cost. It tells the designer how wide the footings need to be and whether special drainage is required.
What is the difference between a slab and a basement foundation?
A slab is a single layer of concrete at grade level, with no usable space beneath the floor. A basement is a full-height excavated space under the house, with footings, walls, and a separate slab floor. A basement adds significant cost but also adds usable square footage that is often finished as living space.
Can you install a foundation in winter?
Yes, but it requires extra planning. Concrete must be kept above freezing during placement and the first few days of curing, which usually means heated enclosures, hot water in the mix, or accelerator additives. Excavation in frozen ground is also slower and more expensive. Most builders prefer to pour foundations outside the deep winter months if the schedule allows.
How do I keep my foundation dry?
Three things matter most: a working drainage system at the base of the walls, soil that slopes away from the house, and downspouts that discharge well clear of the foundation. Inside, a dehumidifier in a basement or sealed crawlspace keeps humidity in a range that does not support mold growth.
What is a monolithic slab foundation?
A monolithic slab is a single continuous pour of concrete that forms both the slab and the shallow perimeter footing in one operation. It is faster and less expensive to build than a stem-wall slab, but it is limited to warm climates and stable soils because there is no deep footing to resist frost heave.
How thick should a residential foundation wall be?
Most poured basement walls are 8 to 10 inches thick. CMU basement walls are typically 8 inches nominal, which is close to the same finished thickness. Wall thickness is determined by structural loads, the height of the backfill, and local code. Going thinner to save money is rarely a good idea.
What is the most common cause of foundation problems?
Water. Poor drainage, plumbing leaks, a high water table, and missing or failed waterproofing all lead, eventually, to cracking, settlement, or both. Most foundation problems are easier and cheaper to prevent during construction than to fix after the house is occupied.




Leave a Reply