
Concrete driveway repair: how to read the damage and choose the right fix
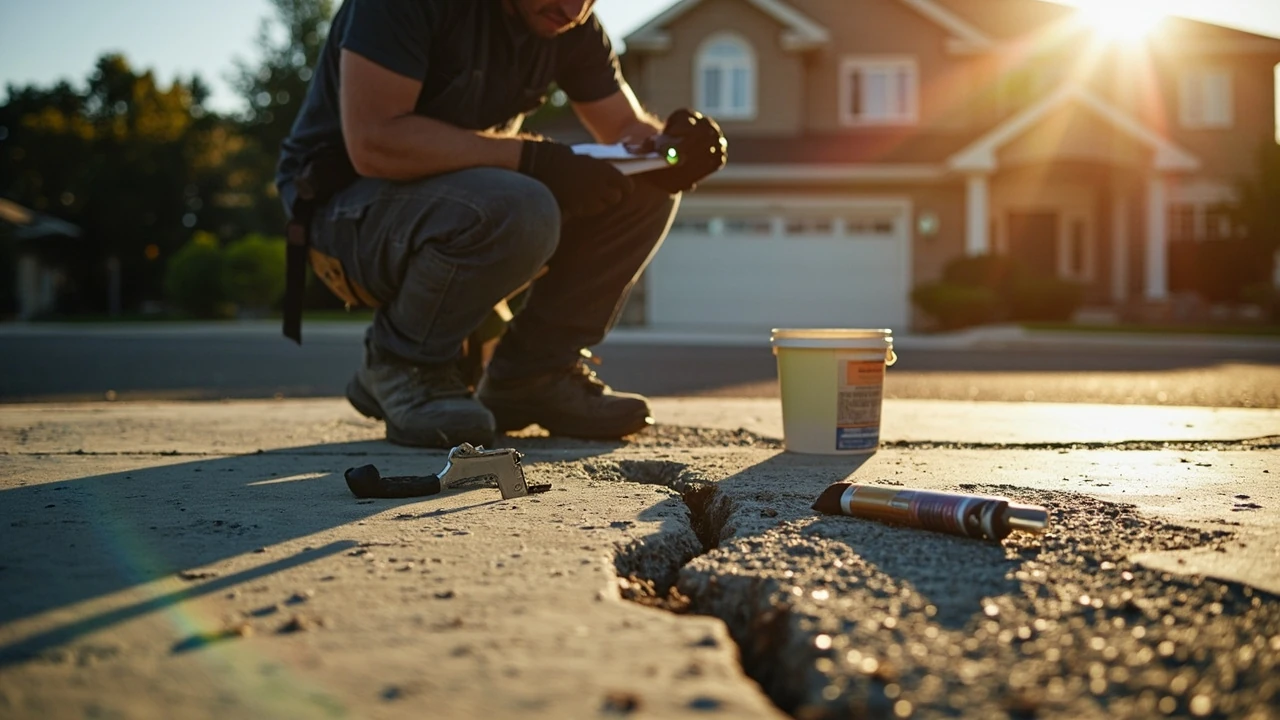
A hairline crack running across a driveway slab rarely looks urgent, but the same crack after a hard winter can split wide enough to catch a snowplow blade. Concrete driveway repair is really a series of small decisions: what kind of damage you are looking at, what caused it, and whether a surface patch will actually hold. Get those three things right and the same slab can keep carrying cars for another decade. Get them wrong and the patch usually pops out within a season, often taking a piece of the surrounding concrete with it.
Most homeowners run into the same handful of problems: hairline shrinkage cracks, wider structural cracks, surface flaking called spalling, broken edges and corners, and whole sections that have settled out of level. Each one points to a different cause and calls for a different product. The goal of this guide is to help you match what you see on the slab to the right repair method, the right material, and a realistic sense of when a DIY patch is reasonable and when a professional is the cheaper option in the long run.
What you will get from this guide
- A simple way to classify the damage on your driveway before you buy anything
- The most common causes of cracking, spalling, and settlement
- The right product family for each type of damage, from crack sealants to resurfacing overlays
- A realistic look at cost, lifespan, and DIY versus professional work
- A short FAQ that answers the questions homeowners ask most often
Start with a careful diagnosis, not a tube of caulk
Most failed concrete driveway repair work fails for one reason: the person treating the symptom without understanding the cause. A crack that keeps opening every winter is a movement problem, not a filler problem. A patch that flakes off after one season is a prep problem. A slab that has dropped two inches at the garage approach is a soil problem. Each of those needs a different tool.
Walk the driveway slowly, ideally after a rain or after washing it down. Water sitting in a depression, seeping out of a crack, or pooling against the foundation tells you a lot. Look at the pattern, not just the individual crack. Parallel cracks, cracks that follow a curve, and a single crack that grows longer every year are different problems with different solutions.
The five damage patterns you will see most often
- Hairline shrinkage cracks. Thin, often random, usually under 1/8 inch wide. They form as the slab cures and are largely cosmetic.
- Structural or settlement cracks. Wider than 1/8 inch, often uneven across the width, sometimes with one side higher than the other. These usually mean the base has moved.
- Spalling and surface flaking. Areas where the top layer peels, pits, or pops off, often near the edges, in tire paths, or where de-icing salt was used.
- Broken corners and edges. Chunks missing at the slab edge, around downspouts, or where snowplows hit.
- Sunken sections. A whole panel that has dropped, creating a noticeable step at a control joint or a low spot that holds water.
Each of these has a different appropriate fix, and the wrong product on the right problem is the most expensive mistake in concrete driveway repair.
Match the cause to the repair method
Once you can name the damage pattern, the next step is to understand what produced it. Repairing the visible crack without addressing the underlying cause is like repainting a ceiling that still leaks.
Freeze-thaw cycles and water intrusion
Water seeps into even hairline cracks, then expands as it freezes. Over a few seasons that small crack becomes a wider one, and the edges start to spall. In cold climates, this is the single biggest driver of concrete driveway repair work. The fix is twofold: seal the crack so water cannot get in, and keep the surface sealed so water cannot soak in through the top.
Heavy loads and weak base
A standard residential driveway slab is usually designed for passenger cars, not delivery trucks or moving vans. If the base under the slab was not compacted well, even normal vehicles can cause a section to settle. This is why some driveways develop a dip right where the tires run, while the center between the wheel paths stays level.
De-icing salts and chemical damage
Rock salt and many chloride-based de-icers are hard on concrete. They accelerate surface scaling and spalling, especially on concrete that was not properly air-entrained for the local climate. A penetrating sealer slows this down but does not stop it once the damage is visible.
Poor original pour or finishing
Overworking the surface, adding water to make finishing easier, or curing too quickly can leave a weak top layer. The result is surface flaking that looks like it came out of nowhere, usually within the first few years after installation.
Repair options by damage type
The table below pairs each common pattern with the repair method that is most likely to hold up. Pricing ranges are general and vary by region, slab size, and whether you do the work yourself. They are intended for comparison, not as a quote.
| Damage type | Typical cause | Recommended repair | DIY difficulty | Approximate cost range |
|---|---|---|---|---|
| Hairline shrinkage crack, under 1/8 inch | Curing shrinkage, minor thermal movement | Flowable polyurethane or self-leveling concrete crack sealant | Low to moderate | Material $15-$40 per tube or bottle; pro $150-$300 |
| Wider structural crack, 1/8 to 1/2 inch, stable | Movement, base shift, freeze-thaw | Epoxy or polyurethane injection; routing and sealing for non-structural joints | Moderate to high | Material $30-$120; pro $400-$900 per crack |
| Spalling and surface flaking, large area | Salt damage, poor finishing, freeze-thaw | Concrete resurfacer overlay across the affected section | Moderate | Material $0.25-$0.75 per square foot; pro $3-$7 per square foot |
| Broken corner or edge, missing chunk | Impact, snowplow, freeze-thaw | Form-and-pour patch with bonding adhesive and sand mix | Moderate | Material $40-$150; pro $250-$600 per repair |
| Sunken slab, drop of 1 inch or more | Compacted base washout or settlement | Slabjacking or poly foam injection to lift, then patch joints | Not recommended as DIY | Pro $500-$1,500 per section |
These ranges are useful for sanity-checking a quote or for budgeting a DIY project, but the right product line still matters. The next section walks through the materials you will actually see on the shelf or in a contractor’s truck.
The materials that actually work in concrete driveway repair
Walk down the concrete aisle at any building supply store and you will see a wall of products that all claim to fix cracks. They are not interchangeable. Each one is formulated for a specific kind of damage, and using the wrong one is the single most common reason a patch fails.
Concrete crack sealants
These are flexible fillers designed for non-structural cracks and control joints. Most are polyurethane or self-leveling acrylic, applied from a tube or bottle. They stay slightly flexible, which lets them move with the slab as temperatures change. Use them for hairline cracks and along expansion joints, never as a structural repair.
Epoxy and polyurethane injection
For wider cracks that are not still moving significantly, an injection system can actually weld the two sides of the slab back together. Epoxy cures very hard and is best for dormant cracks in sound concrete. Polyurethane stays more flexible and tolerates some movement, which makes it a better choice for active cracks. Both require careful surface preparation, including sealing the face of the crack and installing injection ports.
Concrete patch and resurfacer mixes
Patching compounds are thicker mixes for filling small holes and spalled areas. Resurfacers are flowable mixes designed to be poured or squeegeed across a whole section in a thin layer, typically from 1/8 inch to about 1/2 inch. They bond to the existing concrete and create a fresh wearing surface. A resurfacer is the right answer when a driveway is generally sound but looks rough, has widespread shallow spalling, or has many small cracks.
Bonding adhesives and primers
Many concrete patches fail because the new material does not bond well to the old slab. A liquid bonding adhesive brushed onto a clean, dry surface before the patch goes on dramatically improves the odds that the repair will last more than one season. Skipping this step is the single most common DIY mistake.
Penetrating sealers
After repairs cure, a silane-siloxane sealer applied across the whole driveway slows water absorption and protects against salt damage. It does not fill cracks and it does not repair spalling, but it is one of the most cost-effective ways to extend the life of a concrete driveway repair.
DIY versus hiring a pro
Not every repair is a reasonable DIY project. Some are well within range for a homeowner with a weekend and a basic tool kit, and some will cost more to redo than to hire out in the first place.
Reasonable DIY projects
- Sealing hairline cracks with a flowable crack sealant
- Patching small spalled areas and shallow holes with a vinyl concrete patcher
- Resurfacing a worn but structurally sound driveway with a concrete resurfacer
- Applying a penetrating sealer across the whole surface after repairs cure
Better left to a professional
- Lifting a sunken slab with foam injection or slabjacking
- Injecting structural cracks with epoxy or polyurethane
- Replacing a large broken corner where the patch would carry vehicle loads
- Any repair where the cause is unclear or the slab is still moving
If you are weighing the two options, the cost of a failed DIY repair is often the bigger expense. A patch that pops out in a year means buying the materials again, removing the failed patch, and redoing the surface prep. If the diagnosis is uncertain, paying a contractor to evaluate the slab before you start is usually cheaper than redoing a repair.
A realistic look at cost and lifespan
Concrete driveway repair is one of the home maintenance tasks where a small amount of money spent at the right time prevents a much larger bill later. The numbers below are general ranges and should be checked against local pricing, but they are useful for thinking about how the costs stack up.
| Repair or service | Typical cost | Realistic lifespan of repair | Key factors that affect outcome |
|---|---|---|---|
| Hairline crack sealing | $15-$40 in materials, or $150-$300 pro | 3-7 years before resealing | Clean dry crack, correct sealant, full cure before traffic |
| Resurfacing overlay | $3-$7 per square foot installed | 8-15 years with a sealer | Sound base, proper bonding, correct thickness, sealer applied |
| Structural crack injection | $400-$900 per crack | 10-20+ years if cause is addressed | Crack stability, cause of movement addressed, clean injection |
| Slabjacking or poly leveling | $500-$1,500 per section | 10-20+ years | Source of settlement, weight of slab, foam quality |
| Full driveway replacement | $4,000-$12,000 for a two-car driveway | 25-40+ years | Subgrade prep, mix design, reinforcement, curing conditions |
The lifespan column is the one to focus on. A $300 professional crack repair that lasts 15 years is a better value than a $40 DIY tube that has to be redone every two years, and a $6,000 resurfacing that buys the slab another decade is often a smarter move than a $10,000 replacement that is not actually needed yet.
Step-by-step: a typical small concrete driveway repair
This walk-through covers a common repair: a stable structural crack about 3/16 inch wide, with some surface spalling nearby. The same general order applies to most patching and resurfacing jobs. For a deeper look at professional methods and product selection, a practical overview from RUBI’s concrete driveway repair guide covers much of the same ground in more detail and is a useful cross-check.
- Clean the area. Use a chisel and hammer to remove loose or crumbling concrete. Cut a clean edge with a diamond blade if the repair crosses a spalled section, since feathered edges tend to chip off.
- Wash and dry. Pressure wash the repair area to remove dust, dirt, and old sealer. Let it dry completely. Moisture trapped under a patch is one of the most common reasons for failure.
- Apply a bonding adhesive. Brush a liquid concrete bonding adhesive onto the clean, dry surface. Let it get tacky per the product directions. Do not skip this step.
- Fill the crack or hole. For cracks, use a backer rod in deep sections, then top off with a flexible polyurethane or epoxy crack filler. For spalled areas, use a sand-based vinyl concrete patcher or a polymer-modified repair mortar.
- Float and finish. Smooth the patch with a margin trowel so it is level with the surrounding surface. Do not overwork it, and do not add water to the surface to make finishing easier.
- Cure properly. Keep the patch damp and protected from direct sun for the curing period listed on the product, often several days. A plastic sheet laid over the patch helps retain moisture.
- Seal the whole driveway. Once the repair is fully cured, apply a penetrating silane-siloxane sealer across the entire driveway. This protects the patch and the surrounding concrete from water and salt intrusion.
For a resurfacing overlay, the order is similar but scaled up: clean the whole driveway, repair any deep cracks first, apply a bonding adhesive, then pour and spread the resurfacer in sections. Resurfacing is a more demanding DIY project than patching, but it is the right answer when the slab is generally sound and the surface is the problem.
How to avoid the most common repair mistakes
Most failed concrete driveway repair projects come down to a small number of recurring errors. A few minutes spent on each one is the difference between a patch that holds for a decade and one that fails before the first freeze.
- Skipping surface prep. A dusty, dirty, or wet surface will not bond. Pressure washing and drying are not optional.
- Using the wrong product. Standard concrete mix with gravel is too coarse for shallow repairs. Use a sand-based patcher for surface work and a flexible sealant for joints.
- Repairing in the wrong weather. Avoid heavy rain, freezing temperatures, or extreme heat. Heat pulls moisture out of the patch too quickly and leaves it weak.
- Pouring new concrete over a moving slab. Resurfacing fixes surface problems, not structural ones. If the slab is still shifting, fix the cause first.
- Driving on the patch too soon. Respect the cure time. Most repairs need at least several days before vehicle traffic, and some need longer.
- Skipping the sealer. An unsealed patch absorbs water and salt just like the rest of the driveway. A penetrating sealer applied across the whole surface is the cheapest insurance available.
When a repair is not the right answer
There are cases where a repair is throwing good money after bad. If the slab has multiple wide structural cracks, has dropped more than an inch in several places, or is heaving from tree roots or frost, the underlying problem is the slab and the base under it, not the surface. In those cases, full replacement is usually the better long-term decision.
Another situation where repair is not the right call is when a thin layer of new concrete is poured directly over a badly cracked, shifting slab. The pattern of the old cracks will eventually mirror or “telegraph” through the new layer. The cost of removing the overlay, dealing with the mess, and starting over usually exceeds the savings from skipping a proper replacement.
For a broader view of when repair stops making sense and replacement becomes the smarter move, the article on Furnace replacement: when repair stops making sense uses a similar decision framework, even though the equipment is different. The underlying logic is the same: track the cumulative cost of repeated repairs, the age of the asset, and the risk of a failure that damages something else.
A short maintenance plan that extends the life of any repair
Once the slab is in good shape, a light annual routine keeps it that way. None of these steps are expensive, and together they add years to the driveway.
- Inspect the slab each spring for new cracks and lifted edges
- Reseal hairline cracks as soon as they appear, before water gets into the base
- Reapply a penetrating sealer every 3-5 years, or sooner in harsh climates
- Avoid rock salt for the first winter after a new patch, and consider a chloride-free de-icer long term
- Keep downspouts and irrigation directed away from the slab edge so the base does not wash out
For a more detailed look at the broader home maintenance picture, including how driveway work fits into seasonal planning, the post on Landscapers: what they do and how to hire the right one covers grading and drainage around the home, which is often what determines whether a driveway lasts 15 years or 40.
Frequently asked questions
How do I know if a crack is just cosmetic or actually structural?
Width is the first clue. Hairline cracks under 1/8 inch are usually cosmetic, even if they are unsightly. Cracks wider than 1/4 inch, or narrower cracks that are uneven across the width with one side higher than the other, are usually structural. A crack that is still growing longer or wider each season is a movement problem, not a shrinkage problem, and a flexible sealant will not fix it.
Can I pour new concrete over an old cracked driveway?
For a surface that is generally sound but looks rough, a thin resurfacer overlay is a normal and effective repair. For a badly cracked or shifting slab, pouring a new structural layer on top is not a good idea. The cracks from the old slab will eventually mirror through the new layer, and the result is usually a more expensive problem than the original one.
What is the best product for hairline cracks in a driveway?
A self-leveling polyurethane or polyurethane-hybrid crack sealant applied to a clean, dry crack is the most reliable choice for hairline cracks. Epoxy is stronger but is harder to work with and is better suited to dormant structural cracks than to the small shrinkage cracks that show up on most driveways.
How long does a concrete driveway repair need to cure before I can drive on it?
It depends on the product, the slab thickness, and the weather. Most patch and resurfacer products allow foot traffic in 24 hours but need several days to a few weeks before vehicle traffic. Epoxy and polyurethane injection systems often return to service faster, sometimes within hours. Always follow the manufacturer’s stated cure time, and avoid parking on a fresh patch during the first freeze of the season if you can help it.
Is it worth resurfacing an old driveway, or should I just replace it?
Resurfacing is worth it when the slab is structurally sound and the problem is surface wear, shallow spalling, or widespread cosmetic cracking. Replacement makes more sense when the slab has multiple wide structural cracks, significant settlement, or heaving that resurfacing cannot fix. A quick rule of thumb: if you can count the problem areas on one hand, repair or resurface; if the problems are spread across most of the slab, replacement is usually the better long-term value.
Will a sealer stop new cracks from forming?
No. A penetrating sealer reduces water absorption and salt intrusion, which slows freeze-thaw damage and surface scaling, but it does not stop shrinkage cracks from forming as the concrete ages or stop movement cracks if the base is unstable. Sealing is a protective measure, not a structural one.
Can spalled concrete be repaired, or does it have to be replaced?
Shallow spalling across a generally sound slab is one of the better candidates for resurfacing. The damaged top layer is removed or ground back, a bonding adhesive is applied, and a sand-based resurfacer is poured across the section. For deep spalling that exposes the aggregate or for spalling caused by rebar corrosion, the repair is more involved and may need a structural patch or section replacement.
How much does professional concrete driveway repair usually cost?
It depends on the type of repair. Crack sealing is often $150-$400. Crack injection is commonly $400-$900 per crack. Slabjacking or poly leveling runs $500-$1,500 per section. A full resurfacing of a two-car driveway is often $2,000-$5,000. A full replacement is $4,000-$12,000 in most regions, depending on size, access, and finish. The numbers vary by region and by the cause of the damage, so a local written quote is always the right basis for a final decision.
Are DIY concrete repair kits worth it?
For small, well-understood repairs, a good DIY kit with a proper bonding adhesive, polymer-modified patch, and sealer can produce a result that holds up for years. For larger structural repairs, the equipment cost and the risk of a failed patch usually make a professional the better value. The most common DIY failure is not the product, it is skipping the surface prep that the product needs in order to bond.
How do I keep new repairs from failing in the first winter?
Three things matter most. First, let the patch cure for the full time listed on the product, including before you apply a sealer. Second, apply a penetrating sealer across the whole driveway once the patch is fully cured. Third, avoid rock salt on or near the new patch for the first winter, since chloride-based de-icers are hard on fresh concrete. Calcium magnesium acetate and similar chloride-free products are gentler on both new patches and older concrete.


Leave a Reply