
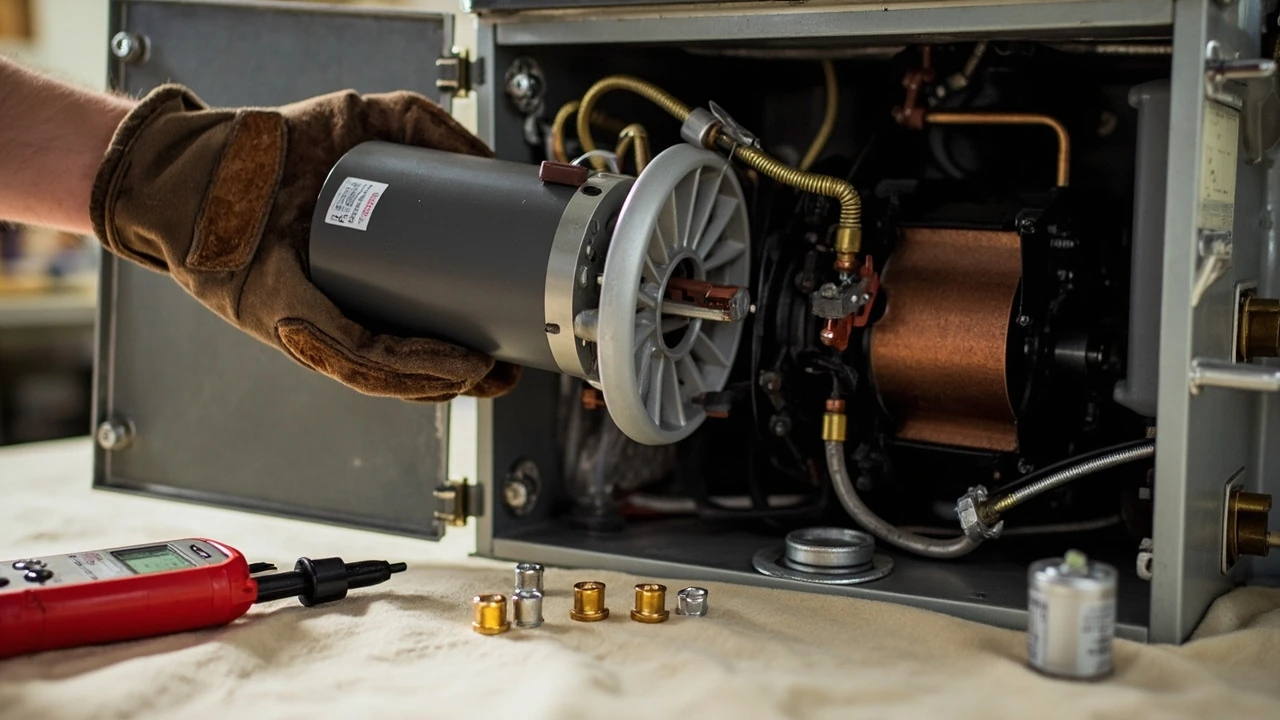
HVAC blower motor replacement: a practical guide for homeowners
You set the thermostat to cool the house on a hot afternoon, hear the outdoor condenser start, and then notice the vents pushing almost nothing. The system is running, the burners or compressor are clearly alive, but the air that should be moving through the ducts has gone quiet. That gap between a system that has power and a system that has airflow is almost always traced back to one component: the blower motor. Understanding how HVAC blower motor replacement actually works, and what it should and should not fix, is the difference between paying for a targeted repair and getting talked into a whole new air handler.
This guide walks through what a blower motor does, the symptoms that point at it, the specs you have to match, and the real sequence a careful DIYer or technician follows on the day of the job. It is written for a homeowner trying to decide whether to open the cabinet themselves, hand it to a licensed HVAC tech, or pick up the phone to ask the right questions before either path.
What the blower motor actually does
The blower motor sits inside the furnace or air handler and spins the blower wheel, often called a squirrel cage. Its only job is to move air. Heated air from the heat exchanger, cooled air from the evaporator coil, and recirculated air from the return ducts all pass through that wheel before being pushed into the supply ductwork. Without a working blower, the rest of the system can run perfectly and the home will still feel stuffy, cold, or warm in the wrong way.
Most residential blower motors fall into three families, and which one you have changes how a replacement is wired and programmed:
- PSC (permanent split capacitor) motors. The most common type in older and mid-range equipment. They need a run capacitor mounted on or near the blower housing, and they run at fixed speeds selected by tapping different speed leads.
- Shaded pole motors. Found in some very old or low-end equipment. They do not use a run capacitor, and replacement is mostly a like-for-like swap.
- ECM (electronically commutated) and variable speed motors. Common in newer high-efficiency furnaces and air handlers. They have a built-in control module, communicate with the furnace control board, and are matched to the specific model. A wrong ECM motor will not program or will not communicate correctly.
The motor is only one part of a larger blower assembly. The assembly typically includes the motor, the wheel, the housing or shell, and the mounting hardware. In many units the whole assembly slides out on rails as a single piece, which makes access far easier than reaching in with a mirror and a flashlight.
Symptoms that point at the blower motor
Before scheduling any work, it helps to sort the symptoms that genuinely suggest a motor problem from the ones that look similar but are caused by something upstream.
No air at all when the system is calling
The thermostat calls for heating or cooling, the outdoor unit or furnace burners are clearly running, but nothing comes out of the supply registers. If the capacitor tests good and the motor has voltage at its leads, the motor itself is usually the fault. No hum, no click, no spin.
Weak airflow from every vent
Air barely trickles out. The wheel may spin, but sluggishly. This pattern usually points to failing motor bearings or a weak run capacitor. The capacitor is the cheaper test, so it is almost always checked first. A capacitor that reads more than five to ten percent below its rated microfarad value mimics a bad motor in many ways.
Grinding, screeching, or rattling from the cabinet
Bad bearings create a distinctive high-pitched grinding or screeching sound. Rattling can mean a loose blower wheel on the shaft, often because the set screw has backed out. The motor may still run in this state, but it is on borrowed time. Letting it seize can damage the wheel, and a damaged wheel is a separate replacement on top of the motor.
Motor starts, runs, then stops on its own
The motor runs for a while and then cuts out, only to start again once it cools. This thermal cycling is a sign that the windings are breaking down and the internal overload is tripping. The motor is drawing more current than it should, and replacement is the only real fix.
Burning smell near the blower compartment
A hot electrical or burning smell around the blower is a serious warning. It usually means the windings are overheating. The system should be shut off at the breaker and not restarted until the motor has been inspected. Continuing to run a motor in this state is a real fire risk, not a theoretical one.
| Symptom | Most likely cause | First thing to check | Typical fix |
|---|---|---|---|
| No airflow, system otherwise running | Dead motor or no voltage to motor | Voltage at motor leads, capacitor value | Replace motor or repair upstream control |
| Weak airflow from all vents | Failing bearings or weak capacitor | Capacitor microfarad reading | Replace capacitor first, then motor if needed |
| Grinding or screeching noise | Bad motor bearings | Hand-spin the wheel with power off | Replace motor, inspect wheel |
| Rattling from the cabinet | Loose blower wheel on shaft | Set screw and shaft condition | Reset wheel, replace set screw, possibly motor |
| Motor starts and stops repeatedly | Worn windings, tripping overload | Amp draw vs. nameplate | Replace motor |
| Burning smell near blower | Overheating windings | Power off, visual inspection | Replace motor, inspect wiring |
Diagnose before you replace
The fastest way to waste money on a blower motor is to skip diagnosis and assume the motor is bad because the vents are quiet. Several conditions can mimic a bad motor, and some of them are far cheaper to address.
Test the run capacitor first
On a PSC motor, the run capacitor lives on or near the blower housing. With the power off at the breaker and verified with a multimeter, pull the capacitor and test it on the microfarad setting. Compare the reading to the value printed on the capacitor label. If it is more than about ten percent below the rated value, replace the capacitor before touching the motor. A weak capacitor is one of the most common reasons a motor that has good windings will not start, or will start and stall.
Hand-spin the blower wheel with power off
Reach in with a gloved hand and try to spin the wheel. It should turn freely and coast for a moment. If it is stiff, grinding, or barely moves, the bearings are shot. The wheel itself has very sharp edges, so heavy gloves are not optional here. Once the motor is seized, the only fix is replacement.
Check for voltage at the motor
Restore power, call for the fan from the thermostat, and use a multimeter to check for voltage at the motor speed leads. On a 120V furnace motor, you should see roughly 120V between the active speed wire and common. On a 240V air handler motor, expect around 240V across the two power leads. If voltage is present and the motor will not run, the motor is the fault. If there is no voltage when the thermostat is calling, the problem is upstream: a blown fuse on the control board, a tripped limit, a bad fan relay, or in a gas furnace, a control board that is holding an error code.
Look for upstream control issues
Before pulling the motor, check the basics. Is the indoor disconnect on? Is the furnace door switch making contact, since many units will not run the blower with the door open or removed? On a gas furnace, the LED on the control board often blinks a pattern that points to a specific fault. Reading that code first can save a wasted motor purchase.
Specs you must match when ordering a replacement
A blower motor is not a generic part. The replacement has to match the old motor on enough dimensions to drop in and run correctly. Mismatches are the single most common reason a DIY blower motor replacement goes wrong.
| Spec | What it means | Why it matters | Where to find it |
|---|---|---|---|
| Horsepower (HP) | Motor output power, typically 1/4 to 1 HP in residential units | Too small strains the motor, too large stresses the wheel and housing | Motor nameplate label |
| RPM | Designed shaft speed | Wheel is balanced for a specific speed range | Motor nameplate |
| Voltage | 120V for most gas furnaces, 240V for electric air handlers | Wrong voltage damages the motor immediately or will not start it | Motor nameplate, furnace data plate |
| Speeds | Number of speed taps: usually 2, 3, or 4 | Has to match the control board terminals and thermostat wiring | Motor nameplate, wiring diagram |
| Capacitor size (µF) | Required run capacitor value for PSC motors | Wrong capacitor changes starting torque and running current | Capacitor label, motor spec sheet |
| Rotation direction | CW or CCW viewed from the lead end | Reverses airflow if installed backward | Motor nameplate and arrow on housing |
| Shaft size and length | Diameter (commonly 1/2 in) and usable length | Wheel has to seat at the right depth | Measure old motor |
| Mount type | Belly band, screw-in bracket, or slide base | Determines how the motor is secured in the housing | Visual inspection of existing mount |
For an ECM or variable speed motor, the matching gets tighter. The replacement usually has to be the same model family as the original, and on many brands the control board has to be programmed or learn the new motor. A universal aftermarket ECM can work, but only when the supplier explicitly cross-references the original part number and the firmware is compatible. If your system uses an ECM, the safe path is to order by the original part number, not by generic specs.
Safety before you open the cabinet
Working around a blower motor means working around mains voltage. In a gas furnace the blower section carries 120V. In an electric air handler it carries 240V. Both are dangerous. The shortcuts below are not optional.
- Turn the furnace or air handler power switch to OFF, then kill the breaker at the electrical panel. On air handlers there may be a separate indoor disconnect near the unit; open that as well.
- Verify the power is off with a multimeter at the junction box or control board terminals before touching any wires. Do not assume the breaker label is correct.
- Wear heavy gloves whenever you are near the blower wheel. The edges are sharp enough to cut skin easily, and that risk does not go away once the motor is out.
- Photograph every wiring connection before disconnecting anything. Color, terminal location, and which speed wire lands on heat versus cool all matter when the new motor goes in.
- Keep the work area dry. Standing on a dry surface and using tools with insulated handles is a small thing that prevents big problems.
If any of that list feels uncomfortable, hiring a licensed HVAC technician is the right answer. The cost of a service call is small compared to the cost of a shock, a duct fire from a miswired motor, or a damaged control board.
The actual replacement sequence
Assuming the diagnosis points squarely at the motor and the replacement is on hand, the job follows a fairly consistent sequence across most residential equipment.
Remove the lower access panel and document wiring
Take the blower compartment door off. Some panels lift straight up and out; others have tabs or screws. Set the hardware aside in a container so it does not disappear into the duct. Photograph the control board terminals, the capacitor wiring, the ground wire location, and the speed leads at the motor. The wiring diagram is also printed on the motor label and often inside the cabinet door. Use both.
Disconnect wires and slide the assembly out
Unplug the motor speed wires from the control board or fan relay. Disconnect the capacitor leads. On some units there is a wiring plate or junction box cover that has to come off first. Remove any thermostat or limit switch wires that block the blower assembly from sliding. The blower assembly is usually held by two to four screws or bolts plus metal clips or rails. A 5/16 inch or quarter inch nut driver covers most of them. Slide the assembly out carefully. It is heavier than it looks, and the wheel edges are unforgiving.
Pull the wheel and separate the motor from the housing
With the assembly on a workbench, loosen the set screw on the blower wheel hub. Sand the motor shaft with emery cloth until bright metal shows, then clean out the rust dust. Slide the wheel off. If it is stuck, work it back and forth rather than hammering the shaft. Mushrooming the end of the shaft makes removal much harder and can ruin the motor even before it is replaced.
The motor is held to the housing by either a belly band with rubber grommets and spacers, or a screw-in bracket common on Rheem and Ruud equipment. Note the exact position of every spacer and grommet on the belly band. They set the motor height inside the housing and have to go back the same way.
Install the new motor and remount the wheel
Transfer the grommets and spacers from the old belly band to the new one in the same order, or mount the new motor on the existing screw-in brackets with the original hardware. Lower the new motor into the housing and snug every bolt evenly before tightening any of them fully. The motor should sit centered, with no wires pinched between it and the housing.
Sand any remaining rust off the new shaft, slide the wheel on, and center it so the clearance looks equal on both sides of the housing. The wheel should not touch the housing or the motor body, but should not float so far out that it wobbles. Tighten the set screw onto the flat of the shaft, not the round side. A drop of blue Loctite on the set screw helps keep it from backing out under vibration. Spin the wheel by hand to confirm it rotates freely without rubbing.
Reinstall the assembly and rewire
Slide the blower assembly back onto its rails and secure the original screws. Reconnect the wires exactly as photographed. On a gas furnace, one speed wire lands on the heat terminal, another on the cool terminal, and the white common lands on the common or neutral terminal. Unused speed wires get capped with wire nuts or parked on a spare terminal if the board has one. On a 240V air handler, the two power leads land on L1 and L2, and the speed leads are assigned to the appropriate taps.
Once the wiring is back, restore power at the breaker and the indoor disconnect. Set the thermostat to fan-on and listen. The motor should start smoothly, ramp to speed without grinding, and run quietly. Switching to cool or calling for heat should bring the right speed on without delay. A quick hand test at a return grille and a supply register will confirm that air is actually moving the way it should.
Cost, time, and the honest DIY versus pro calculus
The numbers around blower motor replacement vary widely because the parts and the equipment vary so much. A few framing points are useful before deciding.
- PSC motor only, homeowner-installed: parts cost is often in the low to mid hundreds of dollars for the motor, plus a capacitor if needed. Tooling is modest: multimeter, nut drivers, gloves, emery cloth.
- PSC motor, professionally installed: add a service-call or diagnostic fee plus labor, which commonly pushes the total into the higher hundreds or low four figures depending on the region.
- ECM or variable speed motor: parts cost is higher, often several hundred to over a thousand dollars for the motor alone, with programming steps that make a professional install more common.
- Whole blower assembly replacement: if the wheel, housing, and motor are all going, the parts and labor move into a range that overlaps with a new air handler, which changes the cost-benefit math significantly.
Time on the job for a confident DIYer with a PSC motor is usually a few hours including diagnosis. A first-timer should expect a longer afternoon, and that is reasonable. The honest question is not whether a homeowner can do the work, but whether the homeowner is comfortable working around 120V or 240V, reading a wiring diagram, and accepting responsibility if a wire lands in the wrong place. If any of that is uncertain, paying a licensed HVAC technician is not giving up, it is making a rational choice.
For context on related HVAC decisions, a homeowner weighing a motor swap against a larger system decision can compare it to the broader choices covered in furnace replacement guidance, since at some point the motor repair stops making sense against the value of the equipment it lives in. In the same way, anyone sizing up whether the blower is worth chasing at all should be aware of the trade-offs discussed in this overview of furnace installation, since the equipment around the motor matters as much as the motor itself.
Common mistakes that turn a simple job into a callback
Most failed blower motor replacements come from a small set of predictable mistakes. Watching for them in advance is the easiest way to avoid them.
- Skipping the capacitor test. Replacing a motor when a $20 capacitor would have fixed the problem is an expensive lesson.
- Wrong rotation direction. A motor installed backward will still spin and will still move some air, but the airflow will be weak and the motor will run hot. The rotation arrow is on the motor housing for a reason.
- Mismatched speed taps. Wiring low to heat and high to cool gives weak heating and noisy cooling. The original wiring photo exists specifically to prevent this.
- Bent or pinched blower wheel. A small dent on the wheel edge is enough to throw the balance off and produce a vibration that sounds like a bad bearing.
- Set screw on the round of the shaft. The screw has to seat on the flat. On the round, it slips under load, the wheel migrates inward, and the motor seizes.
- Forgetting the door switch. Some units will not run the blower with the cabinet open, which makes a perfectly good replacement look dead.
None of these are exotic failures. They are routine, they are easy to spot during the work, and they are all preventable with a little patience and a good photo record of the original setup.
When the motor is not really the problem
It is worth saying directly: a quiet blower is not always a bad blower. A surprising number of blower motor replacements are done on motors that were perfectly fine, with the real fault living somewhere else in the system.
A clogged evaporator coil, a dirty blower wheel, a stuck closed damper, a crushed flexible duct in the attic, a return grille that has been painted over, or a filter that has not been changed in two years can all drop airflow enough to make a good motor look bad. The motor may ramp up, draw more current to compensate, run hot, and finally fail. By the time the motor is replaced, the underlying restriction is still there, and the new motor goes down the same path.
Before any motor swap, it is worth pulling the filter, looking at the coil, and confirming that the return side is actually open. Replacing a blower motor on a system with a crushed return duct just buys the same failure in a shorter time.
After the replacement: a short checklist
Once the new motor is running, a five-minute walk-through catches most issues before they turn into a second service call.
- Confirm airflow at a supply register with a piece of paper or a hand. It should stick lightly to the grille, not get slammed against it.
- Listen at the cabinet for any new hum, rattle, or scrape. A small noise that shows up after the job is a sign the wheel needs recentering or a wire is rubbing.
- Check the amp draw at the motor lead with a clamp meter and compare to the nameplate full-load amps. A motor running well above its rated amps is working harder than it should.
- Run the system through a full heating or cooling cycle and confirm that the motor ramps down correctly when the call ends. A motor that runs forever after a call is a wiring or control issue, not a motor issue.
- Replace the filter and note the date. A clean filter is the cheapest insurance for the new motor.
Frequently asked questions
How long does a residential blower motor usually last?
Most PSC blower motors run for ten to twenty years before the bearings or windings give out. ECM and variable speed motors are often rated for longer in terms of efficiency and programmability, but their control modules can fail earlier. Filter discipline and keeping the wheel clean are the biggest factors in real-world life expectancy.
Can I replace just the motor, or do I have to replace the whole assembly?
In most residential systems the motor and wheel can be replaced separately. The whole assembly typically only needs to be replaced together when the housing itself is damaged or when a manufacturer designs the wheel and housing as a balanced unit. The motor is the wear part; the wheel and housing are not.
How do I know if I have a PSC or an ECM motor?
Look at the motor nameplate. A PSC motor will list a voltage, RPM, horsepower, speed count, and a required run capacitor in microfarads. An ECM or variable speed motor will list a part number, a DC voltage, and a note about a control module. ECM motors also tend to be visibly different, with a larger end housing where the control module lives.
Is a noisy blower always the motor?
No. A loose blower wheel on the shaft, a damaged wheel, a dirty wheel, a foreign object in the housing, or a cabinet panel that is not seated correctly can all create noises that get blamed on the motor. Hand-spinning the wheel with the power off, then running the system with the door open for a careful listen, usually points at the right part.
Can I use a universal aftermarket motor instead of the OEM part?
For PSC motors, a good universal aftermarket motor that matches all the nameplate specs is a perfectly reasonable substitute. For ECM and variable speed motors, it is more complicated. The control board may need to be programmed, the firmware may need to match, and not every cross-reference is reliable. Ordering by the original OEM part number is the safer path on those systems.
What happens if I install the new motor backward?
The motor will run, but in the wrong rotation direction. Airflow will be reduced, the wheel will not be moving air the way the housing is shaped to handle, and the motor will run hot. A motor running backward for any length of time is at risk of tripping its internal overload or burning out the windings. It is a simple mistake to fix if it is caught quickly, and an expensive one if it is not.
Do I need to replace the capacitor when I replace the motor?
Not always, but it is good practice. A capacitor that has been in service as long as the old motor is closer to the end of its life than the beginning. If the new motor is going in with an old capacitor that is marginal, the motor may be blamed for a problem the capacitor is actually causing. Replacing a capacitor at the same time is a small added cost for a much more predictable result.
Is it safe to run the system with a bad blower motor for a while?
It depends on how it is bad. A motor that has failed outright will not move air, but it also will not run and will not get worse on its own. A motor that is grinding, overheating, or tripping its internal overload is a different story. Continuing to run it can damage the wheel, trip the control board, or in the worst case, create a fire risk around the windings. The right move with a clearly failing motor is to shut the system off until the repair is done.
How do I tell the difference between a bad motor and a bad control board?
Check for voltage at the motor leads with the thermostat calling for fan. If there is correct voltage and the motor will not run, the motor is the fault. If there is no voltage or the wrong voltage, the problem is upstream in the control board, the relay, the limit switch, or the door switch. Reading the furnace control board LED pattern on a gas furnace also points at specific control faults that have nothing to do with the motor itself.
Where can I learn more about how the blower fits into a larger HVAC decision?
A blower motor replacement makes sense when the rest of the equipment has real life left in it. When the furnace or air handler is near the end of its service life, the comparison between repair and replacement is a different conversation, and it is worth looking at the broader trade-offs before writing the check for the motor.






Leave a Reply