
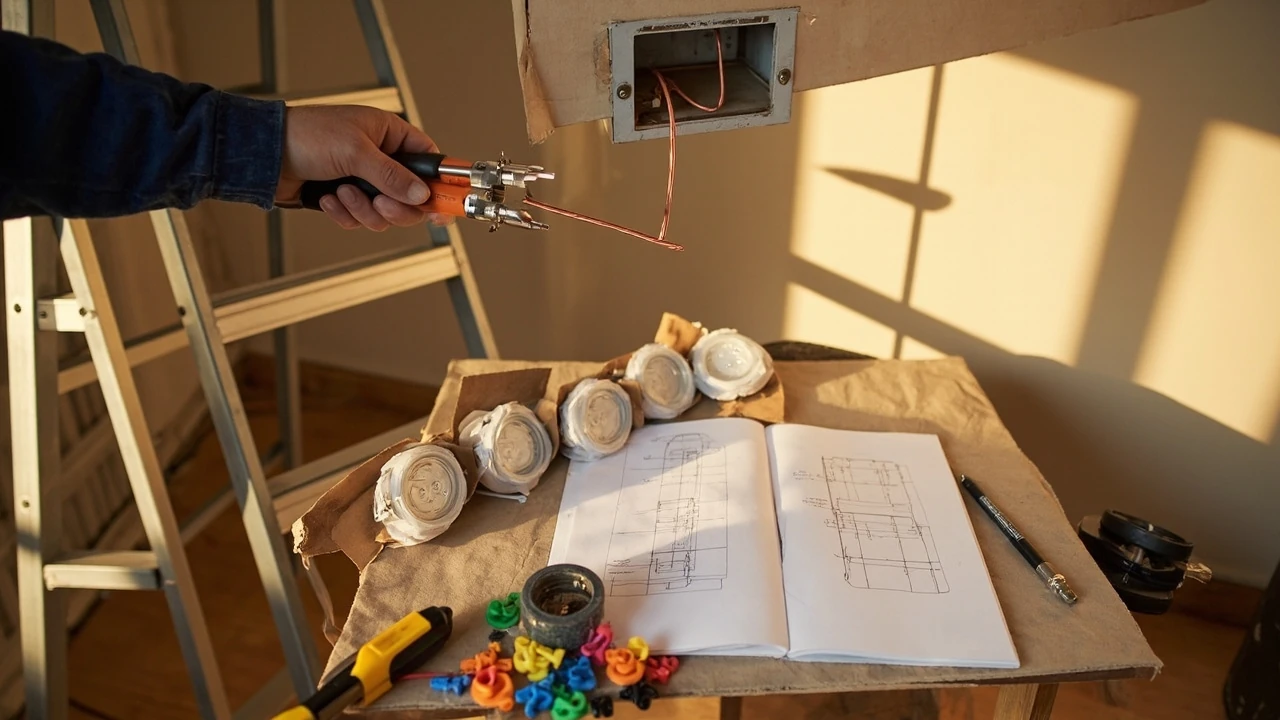
Lighting installation: a homeowner’s practical guide to getting it right
A homeowner in a 1990s two-story decides to replace the dated brass chandelier in the entryway, swap the living room can lights for warm-dimming LEDs, and add under-cabinet strips in the kitchen. The project feels straightforward until the ceiling box turns out to be undersized, the dimmer buzzes with the new bulbs, and the inspector asks whether the bedroom circuit can carry three more fixtures. Almost every lighting installation lives or dies on a handful of decisions made before the first wire is touched, and most of those decisions are about planning rather than hardware.
This guide is for US homeowners who want to think through a residential lighting installation the way a careful contractor would: starting with intent and room use, then layering in code basics, fixture selection, layout math, controls, and a realistic sense of what the work actually involves. It is not a how-to on climbing into your panel. It is a planning resource so that whether you hire the work out or do the simpler swaps yourself, you spend money on the right problems.
Start with what the room is supposed to do
Before you choose a single fixture, decide what the lighting has to accomplish. Most rooms need three layers working together, and each layer answers a different question:
- Ambient light is the overall wash that lets people move safely and see the room. It comes from ceiling fixtures, recessed downlights, flush mounts, or a central pendant.
- Task light targets specific activities: reading, cooking, applying makeup, doing homework. Under-cabinet strips, desk lamps, vanity bars, and pendant lights over an island all qualify.
- Accent light draws attention to art, textured walls, or architectural features. It is usually a directional source, a picture light, or grazing light from a small recessed fixture.
Skipping one layer is the most common reason a finished room feels flat. A kitchen with only recessed cans is bright but harsh; a living room with only a floor lamp feels cozy but cave-like. If you walk through each space and ask, “What do people actually do here, and at what times of day,” the layering decision usually answers itself.
It also helps to think about control. A bedroom needs the bed-side lamp and the overhead on separate switches, and most modern remodels add a ceiling fan circuit on its own switch as well. A kitchen benefits from separate circuits for ambient and under-cabinet so a tripped GFCI in one does not darken the other. These are not luxury features; they are the difference between a lighting installation you tolerate and one you forget is even there.
Code, permits, and what the NEC actually requires
Residential electrical work in the United States is governed by the National Electrical Code (NEC), which is updated on a three-year cycle and adopted with state and local amendments. Most jurisdictions follow the 2020 or 2023 edition as of 2026, but the exact version in force depends on your state, county, and city. Before any new circuit work, check with your local building department about which edition applies and whether a permit is required.
For most homeowners, the relevant code requirements for a lighting installation are not exotic. They cluster around a few key rules:
| Code area | What it means in practice | Where it shows up |
|---|---|---|
| Ceiling box fill | The electrical box must be rated for the number and gauge of wires plus the weight of the fixture | Any heavy chandelier, ceiling fan, or large pendant |
| AFCI protection | Many 15A and 20A branch circuits in living areas require arc-fault circuit interrupter protection, either breaker or outlet | Bedrooms, living rooms, hallways, dens |
| Neutral at the switch | Most electronic and smart switches require a neutral wire in the box | Any switch being upgraded to dimmer, timer, or smart control |
| GFCI protection | Required for some lighting in damp and wet locations depending on local amendment | Outdoor lights, some garage and basement circuits, bathrooms in certain jurisdictions |
| Box support | Fixtures over a certain weight must be supported by a box rated for the load or by a listed brace | Ceiling fans, large chandeliers, heavy linear pendants |
| High-efficacy luminaires | Some states (California’s Title 24 is the best known) require most new or altered fixtures to meet a baseline efficacy and JA8 certification | California and a small number of other jurisdictions |
Permits are typically required when you add a new circuit, run new wiring, or add outlets and switches. Like-for-like fixture swaps on an existing box often do not require a permit, but the moment the scope includes new wiring or relocating boxes, the rules change. If you are hiring an electrician, the permit is usually pulled by them; if you are doing the work yourself, the permit is your responsibility. A good rule of thumb: anything beyond swapping a fixture on the existing box, in a jurisdiction that requires permits, is worth a five-minute call to the building department.
Choosing fixtures that match the room and the box
Once the intent and code frame are set, the fixture selection becomes a lot more focused. There are three practical questions to ask for every fixture on the list.
First, what is the box situation? A shallow, old work ceiling box from the 1980s may not accept a deep LED retrofit. A fixture that ships with a heavy integrated driver may need a box that is rated for the additional weight and the additional heat. If you are switching from incandescents to LEDs, the box rarely has to change, but switching from a small flush mount to a large chandelier often does.
Second, what is the light quality? Color temperature is measured in Kelvin, and most residential lighting lives between 2700K and 3500K. Lower numbers look warm and amber; higher numbers look cool and crisp. Color rendering index, or CRI, measures how accurately the source shows colors. For living spaces, kitchens, and bathrooms, a CRI of 90 or higher is now the practical standard, especially since LED pricing has come down. A warm-dimmable or “dim-to-warm” fixture that mimics the behavior of a halogen at low levels costs more but feels much more natural at dinner.
Third, what is the dimmer story? Not every LED plays nicely with every dimmer. Older TRIAC dimmers designed for incandescent loads can make budget LEDs flicker, drop out at the low end, or hum. Most fixture manufacturers publish a compatibility list, and dimmer manufacturers publish the same. The cheapest path is to use the dimmer model the fixture brand recommends, or buy a fixture that bundles a tested dimmer. If you want smart control, Lutron Caséta, Leviton Decora Smart, and a handful of other ecosystems have wide compatibility and proven track records in older homes.
| Fixture type | Best room fit | Pros | Watch for |
|---|---|---|---|
| Recessed downlight (canless LED) | Kitchens, hallways, basements, modern living rooms | Clean ceiling line, good for retrofits, easy to space evenly | Insulation contact rating, airtight housings for top floors |
| Flush or semi-flush mount | Bedrooms, hallways, low ceilings, rentals | Simple swap, works on shallow boxes, broad style range | Limited throw of light, can feel dated quickly |
| Chandelier or statement pendant | Dining rooms, entryways, primary bedrooms with high ceilings | Strong visual anchor, sets the tone of the room | Box support, weight, dimmer pairing, hanging height |
| Linear or island pendants | Kitchen islands, long dining tables | Even task light over a counter, modern look | Multiple circuits if you want independent control of two pendants |
| Under-cabinet LED strip | Kitchens, workbenches, laundry rooms | Excellent task light with no glare, low profile | Driver location, color consistency between runs, dimmer compatibility |
| Wall sconce | Hallways, bathrooms, beside mirrors, flanking a fireplace | Layered light at eye level, good for ambient plus accent | Backplate size, switch leg location, height off the floor |
| Track or monopoint system | Art walls, flexible layouts, rentals | Easy to re-aim, no box-by-box layout required | Visual style is not for every home, driver and transformer access |
Laying out the lights so the room actually works
Layout is where most lighting installations succeed or fail. A room with a beautiful fixture in the wrong spot will look and feel worse than a basic fixture in the right spot. The first step is to find the room’s focal points: the kitchen island, the seating arrangement, the bathroom mirror, the bed. Light should generally be aimed at the people and the surfaces that matter, not at empty floor.
For recessed downlights, the spacing rule of thumb is to divide the ceiling height by two to get the maximum distance between fixtures. An 8-foot ceiling gives roughly 4 feet on center; a 10-foot ceiling gives 5 feet. Walls usually get a fixture 18 to 24 inches out from the wall, then the rest of the layout is built off that perimeter. The goal is even illumination without scallops on the wall or hot spots on the counter. In a kitchen, plan a fixture roughly 12 to 18 inches in front of the upper cabinet front so the light lands on the counter rather than in your eyes.
For pendants over an island, the rule is closer to art than to math: a single oversized pendant usually looks better than two small ones, and the bottom of the shade should sit 30 to 36 inches above the counter for most people. Two pendants over a longer island should be sized so that the visual mass of the pendants fills about two thirds of the island length. A linear pendant, by contrast, should usually be about two thirds of the length of the island, never longer than the island itself.
Bathrooms reward a little more thinking. Side-mounted sconces at about 60 to 65 inches off the floor, placed at eye level on either side of the mirror, are far more flattering than a single bar above the mirror, which casts shadows down the face. The shower needs its own sealed, damp-rated fixture, ideally on a separate switch from the rest of the bath. If the toilet is in its own nook, give it a small dedicated fixture on a different switch so a late-night visit does not require the main bath light.
Closets and small utility spaces are easy to get wrong. The NEC requires a luminaire in a clothes closet with a fully enclosed lens, and a surface-mounted LED fixture at the front of the closet usually does the job without needing to run a new circuit. Laundry rooms often have a single bulb in the middle of the ceiling, which leaves the backs of the appliances dark; adding a simple LED strip above the front of the machines on the same switch is a small change with a big usability gain.
Estimating cost without fooling yourself
Lighting installation costs have a wide range because so much depends on access, scope, and finish level. Open walls in a renovation are dramatically cheaper to wire than closed walls, which is one reason lighting decisions are easier to make during a kitchen or bathroom remodel than during a one-room refresh. The numbers below are general ranges drawn from common US residential work as of 2026; they will not match your market exactly, but they are useful for sanity checking a bid.
| Scope of work | Typical homeowner cost (US, 2026) | What is included |
|---|---|---|
| Swap existing fixture for similar new fixture (same box, same circuit) | $75 to $300 per fixture if hired out; fixture cost separate | Removal and installation, minor patching, no new wiring |
| Install a fixture where a box already exists but no fixture was in place | $150 to $400 per location | Mounting bracket, basic wiring, bulb, testing |
| Add a new recessed light to an existing circuit (open ceiling) | $100 to $250 per light | Hole cut, housing or canless LED, wire run in open framing |
| Add a new recessed light in a closed ceiling (retrofit) | $200 to $500 per light | Drywall cut and patch, wire fish, canless LED, paint touch-up |
| Under-cabinet LED strip, hardwired with switch | $200 to $400 per linear run of cabinets | Driver, switch, wire, mounting channel, tap-up or splice |
| Add a new circuit for a lighting-heavy room | $300 to $900 per circuit, more in slab or multi-story homes | Breaker, wire run, boxes, switch leg, AFCI or GFCI as required |
| Whole-room lighting design and install (mid-range finishes) | $1,500 to $5,000 per room | Layout, fixtures, dimmers, labor, patch and paint |
| Whole-home lighting package during a renovation | $8,000 to $30,000+ depending on size and finish level | Full design, rough-in, trim, controls, smart integration |
Two structural realities drive most of the spread. First, the labor of running wire in a closed ceiling, especially a multi-story home with fire blocking, is what turns a simple “add a recessed light” into a four-figure item. Second, controls and dimmers have become a meaningful share of the cost. A room with three dimmers, two of them smart, can spend more on the controls than on the fixtures. Decide up front whether you want scene control, app control, voice control, or simple wall dimmers, and let that decision set the budget before you start picking chandeliers.
DIY versus hiring: where the line really is
For US homeowners, the practical line between a sensible DIY lighting installation and a job for a licensed electrician runs along three questions: is the existing wiring sound, is the work inside the scope of what a homeowner can legally do in your jurisdiction, and are you comfortable with the failure modes if something goes wrong.
Like-for-like fixture swaps on an existing box, in a jurisdiction that allows homeowner electrical work, are within reach for most handy homeowners. The job is essentially: turn off the breaker, verify with a tester, document the wiring, swap the fixture, restore power. The DIY playbook that walks through that sequence is a useful reference, especially on the small details like supporting the fixture while you connect the wires and taking a photo of the existing connections before you disconnect anything. The full step-by-step process is covered in The DIY Playbook’s walkthrough on swapping a ceiling fixture, which is a fair representation of what a careful homeowner install looks like.
Where the line clearly moves into professional territory:
- Adding a new circuit at the panel, or extending an existing circuit to a new location in a closed wall.
- Installing a ceiling fan on a box that was not rated for fan support.
- Rewiring a switch loop to add a neutral for a smart switch.
- Any work in a panel, in aluminum branch wiring, or in a home with signs of previous amateur work (double-tapped breakers, missing knockouts, splices outside boxes).
- Any work that requires a permit in your jurisdiction, where local rules require a licensed electrician to pull the permit.
A useful test: if the failure mode is a tripped breaker, the DIY is reasonable. If the failure mode is a fire inside a wall that you cannot see, the job is for a licensed electrician. There is no shame in either choice; the cost of hiring out a fixture swap is often less than the cost of a Saturday spent arguing with a heavy chandelier, and the cost of hiring out a panel job is a small fraction of the cost of a house fire.
Working with a contractor or designer without overpaying
If you hire the work out, the way you scope the bid is the single biggest determinant of what you pay. A bid that says “install five recessed lights in the living room” is a guess; a bid that says “install five 4-inch canless LED retrofits on the existing circuit, IC-rated, with new dimmer, and patch and paint two access holes” is a plan. The more specific the scope, the more the bids converge and the less room there is for change orders.
For projects that touch more than one or two rooms, a lighting design package is often worth the cost. Independent lighting designers typically charge a flat fee per project or a percentage of the lighting scope, and they produce a layout, a fixture schedule, and a control plan that an electrician can build from. The result is fewer holes cut in the wrong places, fewer fixtures that look wrong at night, and a single point of accountability for the design intent. For whole-home renovations, a lighting designer pays for themselves in reduced rework.
When you compare bids, normalize the scope. Make sure every electrician is pricing the same fixture package, the same dimmer package, the same patch and paint responsibility, and the same permit handling. Ask whether the bid includes the trim phase separately from the rough-in phase, since most lighting work bills in two visits and some contractors price only one. Confirm whether the firm is doing the work themselves or subcontracting it, and whether their license and insurance cover the specific scope.
Smart lighting without locking yourself in
Smart lighting has matured to the point where the basic decisions are about ecosystems, not gadgets. The major choices are hub-based systems like Lutron Caséta or Philips Hue, Wi-Fi direct systems like TP-Link Kasa or Leviton Decora Smart, and the major voice platforms (Alexa, Google Home, Apple Home) which increasingly act as brokers between systems. Each has tradeoffs in reliability, latency, privacy, and what happens when your internet goes down.
For most homeowners, the practical rules are these. First, the switch should still work like a switch: a visitor or a child should be able to turn the light on and off from the wall without a phone. Second, the dimmer or switch, not the bulb, is usually the better place to put the smarts, because smart switches keep working when you replace a bulb, and smart bulbs become dumb bulbs the moment someone flips the air-gap switch on a smart switch. Third, think about the radio in the box. A metal old-work box in a brick wall is a tough environment for Wi-Fi; a mesh network or a hub-based protocol like ClearConnect or Zigbee is more reliable.
Retrofitting smart controls into a home with no neutral at the switch box is the single most common surprise. Many older switch loops ran hot and switched-hot only, with no neutral. Smart switches, with very few exceptions, need a neutral to power their radios. The fix is to run a new cable from the switch to the nearest outlet or fixture box, which is straightforward in an open remodel and annoying in a closed wall. If your home has this older wiring, the decision to go smart should be made before the drywall goes up.
Common mistakes that quietly cost money
Most lighting installation mistakes are not dramatic. They are small decisions that compound.
- Under-sizing boxes. The fixture looks fine on day one, and the wire nuts are crammed into the back of the box, and three years later a connection fails because it never had proper room to begin with.
- Mixing color temperatures. A 2700K chandelier in the entryway next to a 4000K recessed in the hallway reads as a mistake even to people who do not know the terminology. Pick a temperature and hold to it across connected spaces.
- Forgetting switch leg count. A room with one ceiling fixture and three ways to control it (entry switch, hallway switch, bedside switch) needs three-way or four-way switching planned before the rough-in. Retrofitting is always more expensive.
- Skipping dimmer compatibility checks. A $15 dimmer with a $40 LED often flickers. Compatibility lists exist for a reason, and most return-window headaches come from ignoring them.
- Over-lighting small rooms. More recessed lights is not always better. A 10 by 10 bedroom with six 800-lumen LEDs is harsh; four 600-lumen LEDs on a dimmer is calmer and uses less power.
- Forgetting night-time behavior. A motion-activated dim nightlight at 5 percent in a hallway or bathroom is a small detail that makes a house feel finished.
Most of these are caught during planning and almost none of them are caught during the actual install. The hour spent reviewing the layout on paper is the cheapest hour in the project.
What to do after the install: a quick commissioning checklist
A lighting installation is not really done when the breaker is back on. The first week in a newly lit space is when you find out what you actually need. A short commissioning pass turns those discoveries into small adjustments rather than permanent regrets.
- Walk every room at night with the dimmers at three different levels: 100 percent, 50 percent, and 10 to 20 percent. Look for dark corners, hot spots, and transitions between spaces.
- Test every switch, dimmer, and smart control in every mode. Confirm that scenes behave the way you described them, and rename anything that no longer matches the room.
- Note any flicker, hum, or drop-out on the dimmer. Most are fixable with a different dimmer model or a better-matched LED, and most fixtures are within return windows during the first week.
- Check that the box covers, trim rings, and paint touch-ups have all cured. Touch up any visible scuffs while the painter is still on the job.
- Save the layout, the fixture schedule, the dimmer list, and the photos of every box before the drywall closed. The next owner, the next remodel, and your future self will all be grateful.
Frequently asked questions
Do I need a permit to add recessed lights to an existing room?
In most US jurisdictions, adding recessed lights to an existing circuit requires a permit because the work involves new wiring, even if no new circuit is added. Like-for-like fixture swaps on an existing box usually do not. The exact rule depends on your city or county, so a quick call to the building department before the work starts avoids a stop-work order or a problem at resale.
Can I install a light fixture where there is no existing box?
A fixture must be mounted to a listed box or to a listed brace, and the box must be accessible, properly supported, and sized for the number of wires plus the weight of the fixture. Adding a box where none exists means cutting the ceiling, mounting a new-work or old-work box to a joist or brace, and running a cable to the nearest power source, which is electrical work that typically requires a permit.
What is the difference between IC-rated and non-IC recessed lights?
IC, or insulation contact, means the fixture is rated to be in direct contact with insulation without overheating. In most US attics, where insulation is continuous over the ceiling, every recessed light must be IC-rated or paired with a cover that keeps insulation a safe distance away. Non-IC fixtures are still common in remodels where the fixture is in a soffit or a drop ceiling, but they are the wrong choice under a blanket of cellulose.
Why do my LED lights flicker on a dimmer?
The dimmer is usually the cause. Many older dimmers were designed for incandescent loads and use a TRIAC or ELV design that does not play nicely with the low-wattage, constant-current drivers inside LEDs. The fix is either a dimmer that is listed as compatible with the specific LED model, or a driver swap to a dim-to-warm LED that is designed to dim smoothly on a wider range of controls.
What color temperature should I choose for my home?
For most US homes, 2700K to 3000K is the standard warm-white range, and 3000K to 3500K is a slightly crisper neutral. Bedrooms and living rooms usually feel best at 2700K to 3000K. Kitchens and bathrooms can comfortably use 3000K, and 3500K is fine for task-heavy spaces like workshops. Pick a temperature and use it consistently across connected spaces, since mixing temperatures reads as a mistake.
How long does a residential lighting installation usually take?
A single fixture swap is typically one to two hours, including the breaker trip, the wire verification, the swap, and the cleanup. Adding a handful of recessed lights to a closed ceiling is usually a one- to two-day job for a two-person crew, including patching and paint touch-up. A whole-home lighting package during a renovation is usually one to two weeks of rough-in plus another one to two weeks of trim, depending on the size of the home.
Do smart switches need a neutral wire?
Almost all of them do. The neutral provides a return path for the small amount of current the radio needs to stay powered even when the switch is off. Older homes with switch loops that do not include a neutral have three realistic options: run a new cable to add the neutral, choose a no-neutral smart switch model, or use smart bulbs controlled by a remote or a voice assistant instead of a smart switch.
Can I install a ceiling fan on any ceiling box?
No. A ceiling fan is one of the most common causes of residential electrical problems because it is heavy, it vibrates, and it is often hung from a box that was never designed for the dynamic load. The box must be specifically rated for fan support, listed for the weight of the fan being installed, and properly secured to a brace or to the building structure. Swapping a light fixture for a fan on a non-rated box is one of the clearest cases for hiring the work out.
What is the typical payback on switching to LED?
For a typical US home that uses lighting several hours a day, an LED retrofit pays for itself in one to three years through lower electricity use and the elimination of bulb replacement. The exact payback depends on usage hours, the cost of electricity in your area, and the price of the LED fixtures or bulbs. High-use spaces like kitchens and outdoor lights see the fastest payback; low-use spaces like guest bedrooms see the slowest.
Should I plan my lighting before or after I pick paint colors?
Lighting first, then paint. The color temperature and the brightness of the light source will change the way every paint color reads in the room. A 3000K LED will make a paint labeled “warm white” look more neutral than it does in a 2700K room, and a 4000K source will pull the same paint blue. Finalize the lighting plan and the fixture specifications, then sample paint swatches under the actual fixtures on the actual dimmer settings before you commit to a color.





Leave a Reply