
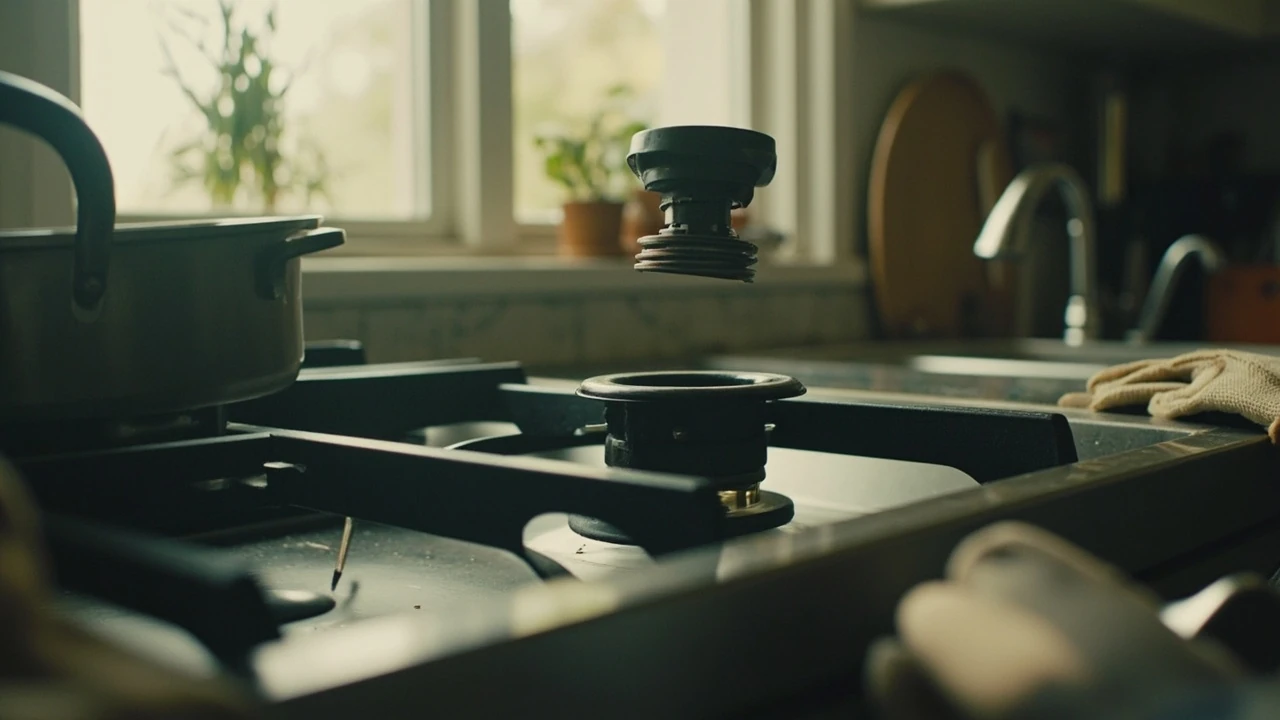
Gas stove repair: a homeowner’s guide to common problems
A burner that clicks without lighting, an oven that runs 50 degrees hot, or a faint gas smell near the cooktop is enough to sideline a kitchen. Gas stove repair sits at the intersection of convenience, food safety, and real combustion risk, and the gap between a ten-minute fix and a service call is often smaller than it looks. Knowing which parts fail, which symptoms are safe to check at home, and which ones belong with a licensed technician keeps a small problem from becoming a recurring one.
This article is for homeowners who want to understand their gas range before they pick up the phone. It walks through the parts that fail most often, the symptoms that point to each one, the safety checks that should happen first, and the practical decision between repairing an older range and replacing it. Because gas work carries genuine risk, the advice here leans conservative: when the symptom points to a gas-side problem, the next step is a qualified service call rather than a guess.
How a residential gas stove is actually built
Most people use “stove,” “range,” and “cooktop” interchangeably, but the appliance in the kitchen is usually a single unit that combines a cooktop on top and an oven below. The cooktop is a sealed or open burner system fed by a regulated gas supply, and the oven is an insulated cavity with its own burner, thermostat, and igniter. The two halves share a gas line, a control area, and on modern units, a single electronic control board.
From a repair standpoint, the two halves fail differently. Cooktop problems tend to involve individual burner components: caps, bases, igniters, spark modules, and the switches that open the gas valve. Oven problems tend to involve the bake or broil burner, the igniter, the temperature sensor, and the control system that regulates heat. Identifying which side of the appliance is misbehaving shapes the service call, because the parts, the labor time, and the safety considerations are different on each side.
Safety checks to do before any gas stove repair
Before troubleshooting any symptom, the appliance needs to be in a safe state. Three checks should happen in this order, every time, regardless of how minor the problem seems.
- Smell test. Natural gas is odorized so a leak is usually noticeable, but propane and small leaks near a pilot or valve can smell musty or rotten rather than strongly sulfurous. If the air near the stove smells like gas, stop and ventilate the room.
- Shut off the gas supply valve. Most ranges have a shut-off valve on the supply line behind the appliance. Closing it stops gas flow to the range without affecting other appliances in the home.
- Cut power at the breaker. Modern gas ranges with electronic igniters, control boards, and digital displays need electricity to operate. Turning off the appropriate 120-volt circuit keeps the appliance from energizing components while a panel is open.
Any symptom that involves a persistent gas smell, a yellow or lazy flame, soot on cookware, or a burner that stays hot after the knob is turned off belongs with a licensed professional. Those are combustion and ventilation issues, not just repair issues, and they fall under local building and fire codes.
Cooktop problems and what they usually mean
Cooktop issues make up the majority of gas stove repair visits. The symptoms look similar from across the kitchen but point to different parts once the burner is opened up.
The burner clicks but does not light
A clicking igniter with no flame is the most common complaint. On most modern ranges the click comes from a spark module sending voltage to the igniter electrode while a gas valve should open at the same time. If the gas valve fails to open, the burner will click indefinitely without igniting. If the spark module fails, there is no click at all, and the burner lights only when a match is used.
Two home-level checks are reasonable before scheduling service. First, make sure the burner cap and base are seated correctly and the ports are clean; a misaligned cap can keep gas from reaching the spark zone even when the valve is open. Second, listen for the gas valve to hiss open. If there is no hiss, the valve or its control switch is the likely fault. Anything beyond a basic cleaning or a confirmed cap reseating is a job for a technician with a multimeter and the correct replacement valve.
The flame is uneven, yellow, or noisy
A healthy gas flame is mostly blue with a small inner cone and a steady, quiet burn. Yellow tips, an orange wash, popping, or a flame that lifts off the burner all point to a combustion problem. Causes range from a clogged burner port and a misaligned air shutter to improper gas pressure and insufficient combustion air in the room.
Homeowners can clean burner ports with a soft brush and a non-abrasive cleaner, and they can confirm the air shutter is fully open. A persistent yellow flame after cleaning, especially with soot on the bottom of cookware, usually means the gas pressure is wrong or the orifice is partially blocked. Both conditions need a technician with a manometer and a pressure reference for the local gas supply.
One burner works, the others do not
When a single burner stops working while the rest of the cooktop is fine, the fault is almost always localized: a failed igniter, a bad infinite switch, a damaged spark wire, or a clogged orifice. A useful diagnostic is to swap the burner cap and base with a working burner. If the problem follows the parts, the burner components need cleaning or replacement. If the problem stays on the same knob, the switch or spark module is the suspect, and the burner will need to be pulled for testing.
The burner ignites but the flame is weak or lifts off
A weak flame or a flame that lifts off the burner cap points to pressure and air-mix problems rather than electrical faults. A partially closed supply valve, a kinked flex connector, an over-adjusted pressure regulator, or a clogged orifice can all starve a burner. Technicians confirm the issue by measuring inlet pressure at the test port and comparing it to the data plate specification, which is typically around 5 inches of water column for natural gas in most U.S. homes.
Oven problems and what they usually mean
Oven-side failures are less frequent than cooktop issues, but they tend to be more expensive because the parts are larger and access is more involved. The most common oven complaints fall into a few predictable categories.
The oven does not heat at all
A gas oven that neither ignites nor heats almost always traces back to the igniter, the gas valve, or the control board. On most modern ranges, the igniter has to draw enough current to open the gas valve; a weak igniter will glow without opening the valve, and the oven will never light. Confirming the diagnosis usually requires checking the igniter’s amp draw against the manufacturer’s specification.
The oven heats but the temperature is wrong
Temperature drift in a gas oven is often blamed on the thermostat, but modern ovens use a temperature sensor and an electronic control rather than a mechanical thermostat. A failing sensor, a control board that is not interpreting the sensor signal correctly, or a weak igniter that cycles on and off too early can all cause under- or overshooting. A homeowner can validate the issue with a separate oven thermometer; if the reading is consistently off by a fixed amount, the control board can be recalibrated. If the reading wanders, the sensor or igniter is the more likely cause.
The broiler works but the bake burner does not
A working broiler with a dead bake burner typically points to a failed bake igniter or a stuck bake gas valve. The two burner assemblies are independent, so the diagnosis is usually straightforward once the oven is opened. Replacing the igniter is one of the more affordable gas stove repair jobs because the part itself is relatively inexpensive, though access can be limited in some wall oven configurations.
Hot spots and uneven cooking
Uneven baking in a gas oven is often a symptom of a weak igniter, a misaligned flame spreader, or a door seal that has lost tension. A home-level test is to bake a tray of plain white bread slices across the rack; darker patches show where the heat is stronger, and the pattern tells a technician where to focus. A simple fix is replacing the door gasket, which homeowners can usually do with a screwdriver. A more involved fix is the igniter and flame spreader combination.
Parts that fail most often on a gas range
While every brand has its own quirks, certain parts show up repeatedly in service tickets. The table below is meant to set expectations for cost and frequency rather than to predict a specific failure on a specific model.
| Component | Where it lives | Typical symptom | Notes for homeowners |
|---|---|---|---|
| Surface igniter (spark electrode) | Under each burner cap | Clicking without flame, no spark | Ceramic tip cracks over time; replace as a set if one fails |
| Spark module | Behind the control panel | No click on any burner, random clicks | Often causes multiple burners to fail at once |
| Infinite switch | Behind the control knob | One burner dead while others work | One-to-one with the knob it controls |
| Oven igniter | Next to the bake or broil burner | Oven will not heat, slow preheat | Must draw enough current to open the gas valve |
| Temperature sensor | Inside the oven cavity | Temperature drift, long preheat | Easy to test with a multimeter, low-cost part |
| Gas valve (oven or cooktop) | Behind the appliance | No gas flow, weak flame | Should only be replaced by a licensed tech |
| Control board | Behind the control panel | Erratic behavior, error codes | Most expensive part, usually replaced only after simpler tests |
| Door gasket | Around the oven door | Heat loss, uneven cooking | Often a homeowner-installable part |
Because the gas valve and the control board sit at the higher end of the cost range, technicians usually test everything else first. A weak igniter can mimic a bad gas valve, and a failing temperature sensor can mimic a bad control board. The order of the diagnosis matters as much as the parts list.
Repair vs. replace: how to make the call
Not every repair is worth the cost, and not every replacement is the right move. The decision usually comes down to three numbers: the age of the appliance, the cost of the repair, and the cost of a comparable replacement.
| Factor | Repair is usually worth it | Replacement is usually worth it |
|---|---|---|
| Age | Under 8 years old | Over 12-15 years old |
| Repair cost | Under about 30 percent of a comparable new range | Over 50 percent of a comparable new range |
| Symptom | Single failed part with a clear diagnosis | Multiple unrelated issues, control board plus mechanical parts |
| Availability | Parts in stock for the model | Parts discontinued or on long backorder |
| History | First major repair on a well-maintained unit | Third or fourth repair in a short window |
The 50 percent rule is a useful shorthand, but it is not the only factor. A 6-year-old range with a failed control board may not be worth repairing if the part is on backorder, and a 14-year-old range with a dead igniter may still be worth saving if the rest of the appliance is solid. The decision is local to the unit, the household, and the cost of the next-best replacement.
What a typical gas stove repair visit looks like
Knowing the structure of a service visit helps homeowners evaluate both the technician and the quote. Most professional visits follow a similar arc.
- Arrival and symptom check. The technician confirms the symptom, asks when it started, and checks the basics such as gas supply, breaker status, and visible damage.
- Diagnostic. Panels are opened, the suspect part is tested with a multimeter, and the diagnosis is confirmed before any work begins.
- Estimate. A flat-rate or time-and-materials estimate is presented, including the part, labor, and warranty terms. A reputable shop will not begin work without approval.
- Repair. The failed part is replaced, gas and power are restored, and the appliance is run through a full operating cycle to confirm the fix.
- Documentation. The technician should leave a record of the work, the part replaced, the warranty terms, and any recommendations for follow-up.
For typical cooktop jobs, the visit takes under an hour once parts are on the truck. Oven-side repairs can run longer because access is tighter and the leak-down test for gas connections adds time. A reasonable expectation is that the technician will spend more time on the diagnostic than on the actual replacement, which is a sign of a careful professional rather than a parts swap.
How to vet a gas stove repair technician
Gas appliance work is regulated in most jurisdictions, and the credentials to look for are different from those for general handyman work. A few filters help narrow the field.
- License and insurance. Many states and municipalities require a specific gas-fitter or gas appliance license. Ask for the license number and verify it with the local authority where applicable.
- Brand experience. Some service companies specialize in specific brands and are factory-trained for them. For a Whirlpool-family range, for example, technicians trained on those exact controls can shorten a diagnostic considerably, as described in the stove service overview from Diamond Factory Service, which covers how factory-certified techs approach Whirlpool-brand ranges and what a typical visit includes.
- Warranty terms. Look for written coverage on both parts and labor, and ask how warranty service is handled if the same part fails again.
- Stocked service vehicles. A technician who arrives with a deep parts inventory is more likely to complete the job in one visit, which matters when the kitchen is the heart of the household.
- Written estimates. Verbal estimates can shift by the time the work is done. A clear, written flat rate is easier to compare between companies.
The cheapest estimate is not always the best one, but neither is the most expensive. The middle of three quotes, with clear warranty terms and a brand-aligned technician, is usually the safest bet for a household that wants the repair to stick.
Common mistakes homeowners make before calling
A surprising number of service calls end with the technician performing a step the homeowner could have done in five minutes. The list below is not a substitute for professional work, but it is a useful pre-call checklist.
- Forgetting the gas shut-off valve. After a kitchen project or a cleaning session, the supply valve is sometimes partially closed. Reopening it fully often restores a weak flame.
- Loose burner caps. A cap that is not seated properly will not light reliably and can also produce a yellow flame as combustion air is restricted.
- Dirty igniters. A quick scrub with a dry toothbrush restores the spark path on a spark-igniter stove. This should only be done with the appliance off and cool.
- Stove still in Sabbath or lockout mode. Many modern ranges ship with a control lock or a demo mode that disables the burners. A glance at the manual’s troubleshooting section often clears this up.
- Recent power outage. Some ranges need a reset after a power interruption. The owner’s manual lists the exact button sequence, usually a long press on a specific key.
If those five checks do not resolve the issue, the next call should be to a service company rather than to the inside of the appliance. Gas work is not a place for a learning experience.
Maintenance that actually prevents future repairs
Ranges do not need a lot of attention, but a small routine prevents the most common service tickets.
- Clean burner ports monthly. Spills and boil-overs are the most common cause of weak or yellow flames. A dry brush, a non-abrasive cleaner, and a quick dry before relighting is enough.
- Check the door gasket twice a year. A loose or stiff gasket wastes energy and can fool the control into extending preheat. Replacement is a homeowner-level job on most ranges.
- Avoid aluminum foil on the oven floor. Foil blocks the bake burner flame and can reflect heat back into the appliance. Most manuals explicitly call this out.
- Test the smoke and CO detectors when working on the range. Any time the gas line is disconnected and reconnected, the detectors in the room should be tested. They are the household’s last line of defense.
- Schedule a five-year check on older units. After the 8-year mark, an annual visual inspection by a technician catches deteriorating flex connectors, stiff gaskets, and small gas leaks before they become dangerous.
What the visit should cost, in general terms
Service pricing varies widely by region, brand, and part, so any specific number is only a starting point. A few patterns hold across most markets. Diagnostic fees often range from a small flat fee to the cost of a half hour of labor, and that fee is frequently credited toward the repair if the homeowner goes ahead. A single-burner igniter or infinite switch replacement is usually one of the more affordable visits. An oven igniter, temperature sensor, or door gasket is in the middle. A control board or a gas valve is at the high end, both for the part itself and for the labor to access it.
The best protection against cost surprises is a written estimate before work begins and a clear warranty on the parts being installed. If the estimate is vague or the warranty is verbal, that is a signal to get a second opinion before authorizing the work.
When the appliance is past repair
There comes a point where a gas range is no longer worth the cost of another visit. Three signals usually show up together: the unit is past the 12- to 15-year mark, parts are discontinued, and the next failure is likely to be a major component. At that point, the discussion shifts from repair to replacement, and the homeowner is essentially shopping for a new range while a technician is opening the old one.
For households replacing an aging range, the choices made on the way out matter for the next 12 to 15 years. Ventilation, gas line condition, and the location of the gas shut-off are all worth checking while the old unit is being removed, because they are harder to address once the new range is in place. The differences between sealed-burner and open-burner designs, modern igniter systems, and the safety standards that apply to new units are worth understanding before signing for a replacement.
A short checklist before you make the call
The points below condense the article into a single pre-call routine. They are not a substitute for a technician, but they make the call shorter and the visit more productive.
- Confirm the gas supply valve is fully open and the breaker is on.
- Check whether the symptom is on the cooktop or the oven side of the range.
- Clean the affected burner cap, base, and igniter with the appliance off and cool.
- Look up the model and serial number, and have them ready for the technician.
- Confirm the symptom is not accompanied by a gas smell before scheduling.
If the symptom does not clear after that routine, or if it returns within a few days, the next step is a service call rather than another attempt at the appliance. The right technician will run a structured diagnostic, present a written estimate, and leave the kitchen cleaner than it was when the visit started.
Frequently asked questions
Is gas stove repair something a homeowner can do safely?
Basic maintenance such as cleaning burner caps, replacing igniter electrodes, and swapping a door gasket is within the capability of most homeowners who are comfortable with a screwdriver. Anything that involves opening the gas line, replacing a gas valve, or working inside the sealed oven cavity should be left to a licensed technician. Gas leaks are dangerous, and improper reassembly can create risks that do not show up until months later.
How do I know if the problem is a bad igniter or a bad gas valve?
The usual pattern is that a weak igniter will glow orange but never fully open the gas valve, so the oven will not heat. A bad gas valve may or may not glow at the igniter, but the technician can confirm the difference by checking the igniter’s amp draw against the manufacturer’s spec. If the current is below the spec, the igniter is the cause; if the current is correct and the valve still does not open, the valve itself is at fault.
Why does one burner work and the others do not?
A single-burner failure almost always traces to a localized part: the igniter, the infinite switch behind the knob, the spark wire, or a clogged orifice. A useful test is to swap the burner cap and base with a working burner. If the symptom follows the parts, the burner assembly is at fault. If the symptom stays on the same knob, the switch or the spark module is the suspect.
What is the average cost of a gas stove repair visit?
Costs vary by region, brand, and part, but a diagnostic fee and a simple igniter or switch replacement is one of the more affordable visits. Oven igniters, temperature sensors, and door gaskets are in the middle of the range. Control boards and gas valves are at the high end, both for the part and for the labor to access it. A written estimate before work begins is the best protection against cost surprises.
How long should a gas range last before it needs to be replaced?
Most modern residential gas ranges last between 12 and 15 years, with longer lifespans for higher-end models and shorter ones for budget units that see heavy use. The decision to repair or replace is usually based on the cost of the next repair relative to the cost of a comparable replacement, along with the availability of parts and the appliance’s overall condition.
Can a yellow flame be fixed without a service call?
A mildly yellow flame is often caused by a clogged burner port or a misaligned air shutter, both of which a homeowner can address with a brush and a careful adjustment. A persistently yellow flame, especially with soot on the cookware, is a sign of improper gas pressure, a partially blocked orifice, or insufficient combustion air. Those conditions need a technician with a manometer and a reference for the local gas supply.
What is the most common reason an oven will not heat?
A weak oven igniter is the most common single reason a gas oven will not heat. The igniter has to draw enough current to open the gas valve; if it glows without lighting, the current is below spec and the valve is staying closed. Replacing the igniter is one of the more affordable gas stove repair jobs because the part itself is relatively inexpensive.
Should I turn off the gas when the stove is not in use?
It is not necessary to shut off the gas supply at the appliance between uses, but it is a reasonable habit in homes with curious children or older appliances. The supply valve should always be shut off before any work on the range, and it should be tested during a routine maintenance visit to make sure it still turns freely and seals completely.
How do I find a qualified technician in my area?
Manufacturer service locators, local trade associations, and verified customer reviews are the most useful starting points. The right technician is licensed for gas work in the local jurisdiction, carries insurance, has a written warranty policy, and is experienced with the specific brand. A reasonable approach is to collect three written estimates and choose the middle one, weighting brand experience and warranty terms as heavily as price.
Is it worth repairing a 15-year-old gas stove?
It depends on what is wrong with it. A 15-year-old range with a failed igniter or door gasket is usually worth repairing, since both parts are inexpensive and the rest of the appliance has years of life left. A 15-year-old range with a failed control board or a discontinued part is usually not worth repairing, since the next major failure is likely to follow. The repair-versus-replace decision is local to the unit, the household, and the cost of the next-best replacement.



Leave a Reply