
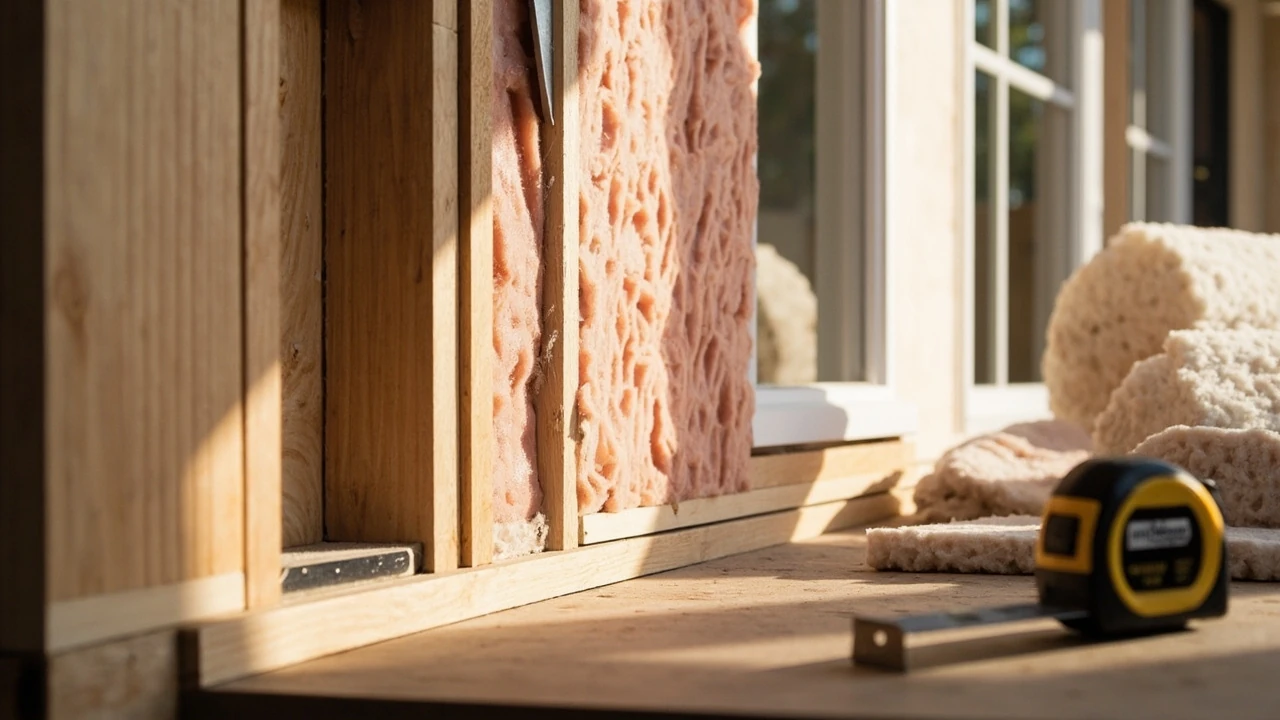
Insulation for walls: choosing the right type for your home
You can feel the difference the first cold morning a room is properly insulated. Drafts stop creeping along the baseboards, the thermostat cycles less often, and the room holds a steady temperature instead of swinging between too cold and too warm. For most homeowners, the wall assembly is the single largest thermal surface in the house, and choosing the right insulation for walls is the most effective way to control comfort, energy bills, and noise between rooms.
This guide walks through the practical decisions behind that choice. It compares the main insulation types, explains where each one performs well, and shows how to read the numbers that actually matter, like R-value, U-factor, and vapor control. It is written for homeowners planning a remodel, a room addition, or a deep energy retrofit, not for engineers specifying a commercial project.
Why wall insulation matters more than most people think
Heat moves from warmer to cooler surfaces until they reach the same temperature. In a typical house, the ceiling, floor, windows, and walls all lose heat in winter and gain heat in summer, but the walls make up the largest share of that envelope. The U.S. Department of Energy estimates that roughly 35% of a home’s heat loss goes through poorly insulated walls in older houses, second only to the attic in many cases.
Better wall insulation does three things at once:
- It lowers heating and cooling costs by slowing conductive heat transfer.
- It raises interior comfort by reducing cold spots and radiant chill near exterior surfaces.
- It reduces noise transmission between rooms and from outside traffic or neighbors.
The catch is that walls are harder to retrofit than attics. Once drywall, plaster, or exterior siding is in place, adding insulation requires either opening the wall from one side or applying insulation over the existing surface. That constraint shapes every choice that follows.
How wall insulation is measured
Two numbers do most of the work when comparing products: R-value and U-factor. They describe the same physics from different directions.
- R-value measures resistance to conductive heat flow. Higher R-value means more insulating power per inch. Products list R-value per inch and total R-value at the installed thickness.
- U-factor measures how much heat passes through a completed assembly, including framing, sheathing, and insulation together. Lower U-factor is better. Whole-wall U-factor is always lower than the insulation alone because studs, plates, and other framing create thermal bridges.
When comparing products for the same wall cavity, R-value is the quickest shorthand. When comparing complete wall systems, such as a 2×4 wall with R-13 batts versus a 2×6 wall with R-21 batts and continuous exterior foam, the whole-wall U-factor tells you which assembly actually performs better in real conditions.
Where insulation for walls actually goes in a home
There are three wall locations that benefit from insulation, and each one is approached differently.
Exterior walls separating conditioned and unconditioned space
These are the outside walls of a heated or cooled home. They deserve the highest R-value the framing can hold. In a typical 2×4 wall, that means a high-density batt or a dense-pack cavity fill. In a 2×6 wall, you can fit thicker batts or more blown-in material.
Interior walls between heated and unheated rooms
Walls that separate a living space from an attached garage, unheated basement, or bonus room over an unheated area still benefit from insulation, even if the room on the other side is technically conditioned. A garage wall with an R-13 batt, for example, keeps the adjacent bedroom noticeably warmer in winter and quieter year-round.
Walls inside the thermal envelope
Interior partition walls between two heated rooms do not need thermal insulation for energy purposes. They often get sound insulation, like mineral wool batts, for noise control, but the goal is acoustic performance, not R-value.
The main insulation types and how they compare
Each insulation material trades off R-value per inch, cost, air sealing, moisture handling, fire resistance, and ease of installation. The table below summarizes the common options for residential wall cavities.
| Material | Typical R-value per inch | Form | Best wall application |
|---|---|---|---|
| Fiberglass batt | 3.1–4.0 | Pre-cut batts and rolls | New 2×4 or 2×6 framing, open stud bays |
| Mineral wool batt | 3.0–3.3 | Pre-cut batts | Stud bays where fire or sound performance is a priority |
| Blown cellulose | 3.2–3.8 | Loose fill, dense-packed | Retrofit through small holes, enclosed existing walls |
| Sprayed open-cell foam | 3.5–3.8 | Liquid spray that expands | Irregular cavities, around penetrations, air sealing plus insulation |
| Sprayed closed-cell foam | 6.0–7.0 | Liquid spray that expands and cures rigid | 2×4 walls needing high R-value, exterior continuous layer, moisture-sensitive assemblies |
| Rigid XPS foam board | 5.0 | Sheets | Continuous insulation over exterior sheathing, interior basement walls |
| Rigid polyiso foam board | 6.0–6.5 | Sheets | Continuous exterior insulation, cathedral ceiling walls, above-grade exterior |
| EPS foam board | 3.8–4.4 | Sheets | Continuous exterior insulation, foundations, EIFS systems |
Whole-wall performance is not the same as insulation R-value alone. A 2×4 wall framed at 16 inches on center with R-13 fiberglass batts has roughly 18% of its area as solid wood studs, which conduct heat about four times faster than the insulation next to them. Wrapping the same wall with a one-inch layer of polyiso over the sheathing raises whole-wall R-value substantially because it covers the studs and reduces thermal bridging.
Choosing between cavity insulation and continuous exterior insulation
There are two distinct strategies, and most modern wall designs combine them.
Cavity insulation fills the space between studs. It is the cheapest, most familiar option and works well in new construction where the framing is open. The downside is thermal bridging: every stud, top plate, and bottom plate conducts heat around the cavity insulation.
Continuous exterior insulation covers the outside of the sheathing, so it runs uninterrupted across studs, plates, and framing connectors. Even an inch of rigid foam on the exterior of a 2×4 wall can raise the effective R-value of the assembly by 10–15% because it suppresses the bridge.
Combining both layers is the path most new high-performance homes follow. For example, a 2×6 wall with R-21 dense-pack cellulose in the cavity plus R-7.5 polyiso on the exterior delivers a whole-wall performance close to a 2×4 wall with R-15 plus R-10 foam, but with deeper cavity space for electrical and plumbing runs.
Matching insulation to the climate zone
Climate shapes the right answer. The 2021 International Residential Code and the 2024 IECC both group the United States into zones that dictate minimum wall R-values, and the same insulation strategy that works in Atlanta will underperform in Minneapolis.
| IECC climate zone | Typical regions | Recommended wood-frame wall R-value (cavity + continuous) |
|---|---|---|
| Zone 3 | Houston, Atlanta, Phoenix | R-13 cavity or R-0 + R-7.5 continuous |
| Zone 4 | San Francisco, Nashville, Albuquerque | R-13 cavity + R-2.5 continuous, or R-15 cavity |
| Zone 5 | Chicago, Boston, Denver | R-20 cavity, or R-13 + R-5 continuous |
| Zone 6 | Minneapolis, Buffalo, Portland ME | R-20 cavity + R-7.5 continuous, or R-13 + R-10 continuous |
| Zone 7–8 | Duluth, Fairbanks | R-21 cavity + R-10 continuous, or R-13 + R-12.5 continuous |
These are code minimums, not best practice. Many designers in zones 5 and 6 aim for R-30+ whole-wall assemblies because the energy savings over the life of the house justify the added cost.
Deciding between new construction and retrofit
The two projects look very different, and the right product changes with the access you have.
New construction or gut renovation
When studs are open, you can choose any cavity insulation. Fiberglass, mineral wool, cellulose, and spray foam all work. This is also the right time to add a continuous exterior insulation layer and a proper air barrier, since the sheathing and house wrap are exposed. Many builders in cold climates now wrap the entire house in rigid foam or use Zip System sheathing before siding goes on.
Retrofit from the interior
When the exterior is finished and you do not want to disturb it, insulation is installed from inside. The most common approach is dense-pack cellulose, blown through small holes drilled into the drywall or removed plaster. The holes are patched and refinished. This works best in walls that already have some insulation, because dense-pack cellulose relies on the existing sheathing and siding as the air boundary.
Retrofit from the exterior
Removing siding to add a continuous layer of rigid foam is more invasive but lets you reach the cavity from outside and dramatically upgrade performance. Some homeowners use this opportunity to also replace old windows and rework flashing details.
Air sealing, vapor control, and why they go with insulation
Insulation that is not paired with air sealing underperforms. A 1/4-inch gap around a window can let more cold air into a wall than several square feet of insulation keep out, because moving air transfers heat far faster than still air does. In practice, a wall assembly should be treated as a system:
- Air barrier: a continuous layer such as sealed drywall, zip sheathing, or house wrap that stops outside air from leaking into the cavity.
- Vapor retarder: a material that slows water vapor diffusion. In cold climates this goes on the warm interior side. In hot-humid climates, vapor handling is different and depends on the assembly.
- Insulation: the thermal resistance layer that fills the cavity and covers framing where possible.
A common mistake is installing fiberglass batts and skipping air sealing. Batts do not stop air; they only slow conductive heat. Without a separate air barrier, conditioned air can blow right through the batts, carrying moisture that condenses inside the wall. Spray foam is the exception: closed-cell spray foam acts as both insulation and a vapor retarder, and open-cell foam is a decent air barrier at typical installed thicknesses.
Moisture and wall assemblies
Walls fail when they get wet and stay wet. The two most common moisture problems are condensation inside the cavity and bulk water leaks from outside.
Condensation forms when warm, humid interior air reaches a surface below its dew point. In a Minnesota wall in January, the dew point can easily sit inside the stud cavity, which is why interior polyethylene sheeting has been standard in cold climates for decades. In a Houston wall in July, the dew point sits closer to the exterior sheathing, so vapor retarders belong on the outside, not the inside. Getting this wrong traps moisture and rots the framing.
Bulk water is handled by flashing, house wrap, and a drained gap behind siding. Adding rigid foam to the exterior of a wall does not fix poor flashing; it just moves the dew point around. If a wall has chronic leaks, fix those before adding more insulation.
Cost and payback for wall insulation
Costs vary widely by region, wall size, and access, but the table below gives rough order-of-magnitude ranges based on typical residential jobs in the United States. Use them as a planning estimate, not a quote.
| Project type | Insulation choice | Installed cost per square foot of wall | Notes |
|---|---|---|---|
| New 2×4 open studs | R-13 fiberglass batt | $0.50–$0.90 | Lowest cost, easy DIY, requires careful air sealing |
| New 2×6 open studs | R-21 fiberglass or mineral wool | $0.90–$1.40 | Standard for many cold-climate code builds |
| New 2×6 open studs | Open-cell spray foam (full fill) | $1.80–$2.80 | Acts as air barrier; check climate-specific vapor profile |
| New 2×6 open studs | Closed-cell spray foam (full fill) | $3.00–$4.50 | Highest R per inch; doubles as vapor retarder |
| Retrofit through drywall | Dense-pack cellulose | $1.20–$2.20 | Best interior option for enclosed walls |
| Continuous exterior layer | R-5 polyiso over sheathing | $2.00–$3.50 | Adds significant thermal bridge control |
Payback depends on local energy prices and how leaky the wall was before. In zone 5, retrofitting uninsulated 2×4 walls with dense-pack cellulose typically pays back in 5 to 8 years through lower heating bills. In milder climates the payback is longer, but comfort gains still make the project worthwhile for many owners.
How to read a real-world wall specification
Wall schedules on architectural drawings compress a lot of decisions into one line, such as “2×6 wall, R-21 + R-5 polyiso, 1/2″ gypsum, vinyl siding.” Reading that line step by step reveals the assembly:
- 2×6 stud wall: 5.5-inch-deep cavity.
- R-21 cavity insulation: usually a high-density fiberglass batt or dense-pack cellulose.
- R-5 polyiso over sheathing: a one-inch layer of rigid foam installed over the OSB or plywood sheathing, providing continuous insulation.
- 1/2″ gypsum: standard interior drywall, which also serves as the interior air barrier when sealed at edges and penetrations.
- Vinyl siding over house wrap: the exterior cladding and a separate drainage plane.
Total whole-wall R-value in this example is roughly R-30 effective, even though the cavity insulation alone is R-21. That difference is why continuous exterior layers have become standard practice in cold climates.
Installation details that affect real performance
Even the right product installed poorly can underperform. A few details matter more than product brochures suggest.
- Compression: fiberglass batts compressed into a cavity that is too tight lose R-value. An R-19 batt squeezed into a 2×4 bay performs closer to R-13.
- Gaps and voids: a 2% gap around a batt can cut effective performance by 10% or more. Cut batts carefully and fill the full cavity, not just the center.
- Electrical and plumbing: insulation should be split around boxes so it reaches the back of the cavity, not just the front face.
- Top and bottom plates: dense-pack insulation or foam at the top and bottom of each bay stops air from flowing through the cavity vertically.
- Windows and doors: the gap between the rough framing and the window frame should be filled with low-expansion spray foam, not just fiberglass.
If the project involves opening the wall, it is also the right time to inspect the framing for rot, insect damage, or old wiring that should be upgraded. Adding insulation over compromised framing only delays the inevitable.
When to call a professional
A homeowner with a utility knife, a staple gun, and patience can install fiberglass batts in open stud bays. Some other situations benefit from professional help:
- Dense-pack cellulose retrofit requires a specialized blower that fills the cavity to a target density. Underfilled walls settle, leaving a cold gap at the top.
- Spray foam requires proportioning equipment, protective gear, and training to install safely and at the correct thickness. Off-ratio foam can off-gas or fail to adhere.
- Exterior continuous insulation changes window and door trim details. Flashing around openings has to be redone correctly or water will find its way in.
- Older homes with knob-and-tube wiring or aluminum branch circuits often need electrical updates before insulation, especially dense-pack cellulose, which surrounds the wiring and can cause overheating if the wiring is not rated for it.
A qualified insulation contractor or a general contractor experienced with energy retrofits will typically provide a written scope, density targets for blown products, and a list of assemblies to be treated.
Common mistakes to avoid
Most wall insulation problems fall into a small number of patterns. Avoiding them is easier than fixing them later.
- Ignoring air sealing: insulation is not an air barrier. Pair every insulation project with sealing top plates, penetrations, and window rough openings.
- Mixing vapor rules across climates: a wall in Phoenix is built very differently from a wall in Boston, even at the same R-value. Follow the climate-appropriate vapor strategy, not a generic online guide.
- Stuffing too much insulation into too small a cavity: compression reduces R-value and can pinch wires and pipes.
- Leaving gaps around outlet boxes: exterior electrical boxes are a major air leak. Use pre-fabricated foam gaskets under cover plates.
- Skipping the exterior insulation layer because the cavity is “full enough”: a continuous exterior layer costs more but usually delivers a better whole-wall result than adding another inch of cavity insulation.
Where the industry is heading
Wall insulation practice has shifted noticeably over the past two decades. Code minimums have risen, building science has replaced rule-of-thumb choices, and homeowners are asking for assemblies that perform closer to the Passive House standard. Three trends are worth noting:
- Continuous exterior insulation is becoming standard in cold and mixed climates, driven by code updates in the 2021 and 2024 IRC.
- Bio-based insulation materials such as wood fiber boards and hemp batts are entering the residential market, offering lower embodied carbon and good moisture buffering.
- Hybrid assemblies that combine a moderate amount of spray foam with cellulose are common in deep retrofits, balancing cost, air sealing, and moisture control.
For a homeowner planning a project in the next few years, the practical takeaway is that walls built today will need to perform for decades, so designing the assembly to current high-performance practice usually pays off even when the code minimum would be cheaper.
Building a wall insulation plan in five steps
Pulling the choices above into a workable project plan usually follows the same sequence.
- Identify the climate zone and code minimum for the wall. This sets the floor on R-value and the basic vapor strategy.
- Inspect the existing wall for moisture, wiring, and access. Decide whether the project is a new build, interior retrofit, or exterior retrofit.
- Choose the cavity insulation based on access, R-value target, and air-sealing needs. Fiberglass for open new construction, cellulose for interior retrofits, spray foam for irregular cavities or high R-value needs.
- Decide on a continuous exterior layer if the budget and scope allow. Even a modest R-5 layer improves whole-wall performance and reduces thermal bridging.
- Schedule air sealing, moisture, and detailing work alongside the insulation. Confirm window flashing, house wrap integration, and interior air barrier details before installation.
A well-planned wall assembly typically costs only slightly more than the minimum-code approach, but the comfort and energy savings over the life of the house are noticeably larger.
A short checklist before signing the contract
- Confirm the assembly in writing: stud size, cavity insulation product and R-value, continuous exterior layer, interior and exterior finishes.
- Ask for the target installed density of any blown product and the coverage chart the installer will use.
- Verify that the air barrier and vapor strategy match the climate zone, not just the product brochure.
- Request that penetrations, window rough openings, and top plates be sealed before insulation is covered.
- Plan for an inspection of the framing and sheathing before drywall closes the wall. This is the only chance to fix what is behind it.
With the right assembly on paper and the right crew on site, insulation for walls becomes a one-time project that quietly pays back for the next 30 to 50 years in lower bills, fewer drafts, and quieter rooms.
Frequently asked questions
What R-value do I need for wall insulation?
It depends on your climate zone and the framing depth. In zones 5 and 6, code minimums call for R-20 to R-21 cavity insulation plus continuous exterior insulation, which delivers an effective whole-wall R-value of about R-30. In zone 3, R-13 cavity insulation can meet code, but many homeowners add continuous exterior insulation for comfort and noise control regardless.
Is blown-in cellulose a good choice for existing walls?
Yes, dense-pack cellulose is the most common interior retrofit for enclosed walls. It is installed through small holes drilled into the drywall or exterior siding and pumped in at a target density that resists settling. It performs well in wood-frame walls that already have a sheathing and siding layer to act as the air boundary.
Can you over-insulate a wall?
In practice, the limit is rarely the insulation itself but the wall assembly’s ability to dry. Adding insulation without adjusting the vapor profile can trap moisture, especially in cold climates. The right approach is to size the wall to the climate and pair the insulation with a compatible air barrier and vapor strategy.
Do I need a vapor barrier with fiberglass batt insulation?
In cold climates, an interior vapor retarder such as polyethylene sheeting or kraft-faced batts is standard with fiberglass. In hot-humid climates, the vapor retarder typically goes on the exterior side. Spray foam and dense-pack cellulose handle vapor differently and usually do not need a separate sheet, but details depend on the climate and assembly.
Is spray foam worth the higher cost?
Spray foam is worth considering when the cavity is irregular, when air sealing is a major goal, or when the framing depth is limited and you need a high R-value in a small space. Closed-cell foam roughly doubles the cost of fiberglass but also acts as a vapor retarder and stiffens the wall. For straightforward open stud bays, fiberglass or cellulose usually delivers similar whole-wall performance at lower cost.
What is the difference between cavity insulation and continuous insulation?
Cavity insulation fills the space between studs. Continuous insulation runs over the entire exterior sheathing without interruption, covering studs, plates, and other framing members that would otherwise act as thermal bridges. Most high-performance walls use both: a cavity layer for the bulk of the R-value and a continuous exterior layer to suppress bridging.
Will adding wall insulation reduce outside noise?
Yes, but not all insulation is equally good at sound control. Mineral wool and dense-pack cellulose are among the best acoustic performers, while closed-cell spray foam is slightly less effective because its rigid structure transmits vibration more readily. Adding insulation to a wall typically reduces mid- and high-frequency noise noticeably, but very loud low-frequency traffic may need additional treatments.
How long does wall insulation last?
Properly installed insulation in a wall that stays dry can last the life of the building. Fiberglass, mineral wool, cellulose, and rigid foam do not degrade under normal conditions. The main risks are moisture damage, pest infestation, and physical disturbance during renovations. Inspecting the wall every 10 to 15 years during other work is usually enough to catch problems early.






Leave a Reply