
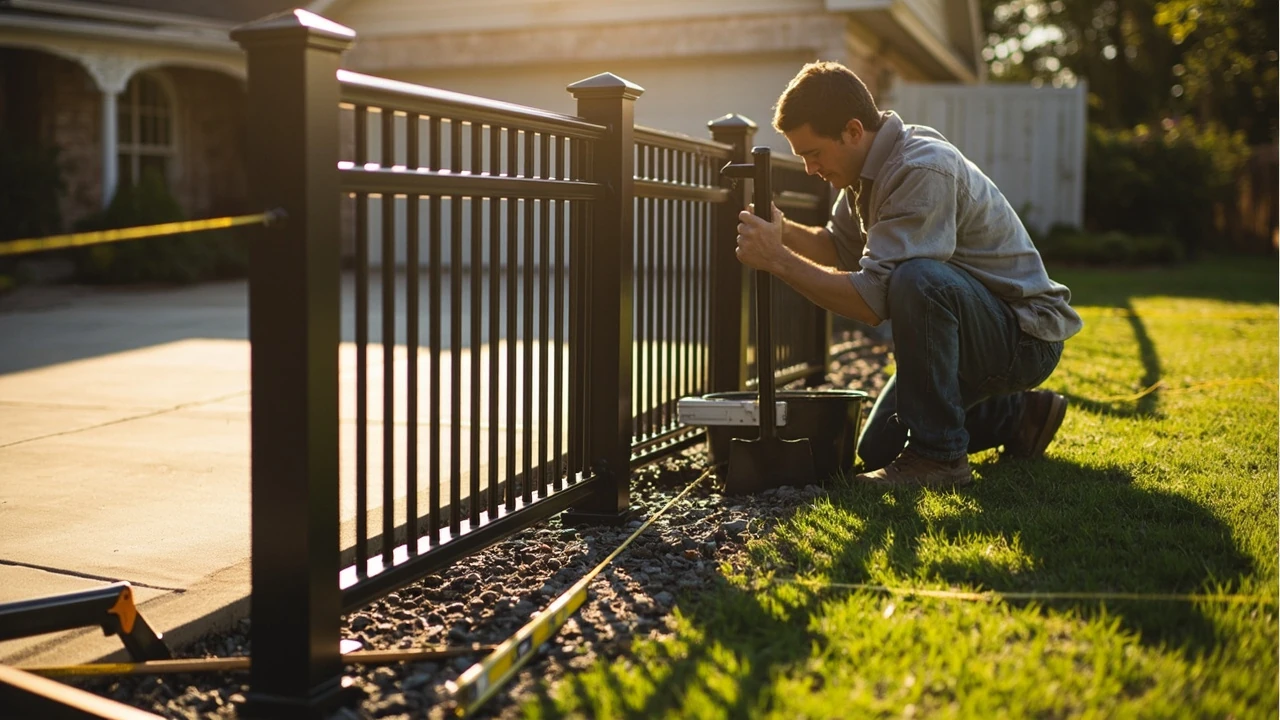
Wrought iron fence installation: what homeowners actually decide
A wrought iron fence installation is one of those projects that looks simple from the curb and quietly turns into a sequence of small decisions once the measuring tape comes out. Post spacing, panel weight, footing depth, gate swing, finish type, and the local rule about how tall a front-yard fence can be all change the result. The good news is that the process itself is well established, and the choices that trip people up are limited and predictable.
This guide walks through a real residential installation the way a contractor or experienced homeowner would think about it: what to confirm before digging, how the layout is set, how posts and panels are anchored, where gates and grade changes complicate things, how finishing and maintenance extend the life of the fence, and what changes if you choose modern mild steel that mimics the look of true wrought iron. Costs are discussed in general ranges because prices vary by region, panel style, and site conditions, but the decision logic stays the same in any market.
What most people mean by “wrought iron” today
The phrase wrought iron fence installation is still the most common way homeowners describe this kind of work, but the material on the truck is almost never historical wrought iron. The traditional alloy, made by hand in a charcoal or coke hearth, is no longer produced on a commercial scale, and most items sold as “wrought iron” are actually made of mild steel shaped to look like the older metal. According to the overview of the material’s history and properties, modern decorative ironwork, including fences and gates, is generally mild steel that is forged or cast and finished to resemble the older hand-worked product. The practical takeaway is that the visible look, the joining methods, and the corrosion behavior are what actually matter on site, not the metallurgical category.
There is one real difference worth keeping in mind. Genuine historical wrought iron has fibrous slag inclusions that give it a characteristic grain and a degree of corrosion resistance from those silicate filaments. Mild steel does not have that fiber and corrodes more uniformly if the protective finish fails. For a homeowner, this means the long-term performance of any “wrought iron” fence is dominated by the coating system and the maintenance you give it, not by the difference between the two materials.
Plan the project before you set the first post
Most installation problems show up before a single hole is dug. A short planning pass saves a weekend of rework.
Confirm property lines, easements, and utilities
Before you mark any post locations, confirm the actual property line, not the edge of the lawn. Fences installed on a neighbor’s parcel can be ordered removed at the homeowner’s expense. Local records will show any utility easements, drainage easements, or sidewalk easements that limit where solid objects, including fence posts, can be placed. Most jurisdictions also require a locate request for buried utilities before any digging; in the United States, the 811 “Call Before You Dig” service is the standard step. Hitting a buried gas, water, or communications line during a fence installation is both dangerous and expensive, and it is the most common preventable accident on residential fence work.
Check local rules for height, style, and permits
Front-yard fences in many residential zones are capped at about 3 to 4 feet, side and rear fences are often allowed up to 6 feet, and corner lots frequently have sight-line rules that limit fence height within a certain distance of the intersection. Some historic districts and HOAs restrict the use of spear-top pickets, “spiked” finials, or solid-looking panel infills for security fences. A quick call to the local planning or building department confirms whether a permit is required, what inspections apply, and whether the fence has to be set inside the property line by a specific offset.
Decide the goal before choosing the style
The right panel and post configuration depends on what the fence is actually for. A pool code fence, a pet containment fence, a privacy fence, and a decorative front-yard fence have different requirements. A useful way to keep this honest is to write one sentence that describes what the fence has to do, and then choose the panel and gate system that meets that sentence.
| Primary goal | Typical panel height | Pickets and infill | Gate considerations |
|---|---|---|---|
| Decorative front-yard boundary | 3 to 4 ft | Open picket spacing for visibility | Single walk gate, self-closing optional |
| Pool code compliance | 4 ft minimum in most jurisdictions | Pickets spaced so a 4 in sphere cannot pass | Self-closing, self-latching gate with latches at code height |
| Pet containment (large dog) | 4 to 5 ft | Close picket spacing; no climbable mid-rail ledges | Self-closing gate, latch above dog reach |
| Privacy with security | 6 to 8 ft | Tight picket spacing, optional privacy slats | Heavy-duty gate frame, drop rod on double drives |
| Driveway security | 6 to 8 ft with spear tops | Open picket, finials discourage climbing | Automated or manual swing/slide driveway gate |
Tools, materials, and the parts of a panel
Knowing the names of the parts makes it easier to talk to suppliers, read installation guides, and order replacements. The components below show up on almost every residential wrought iron fence installation.
- Terminal post: an end, corner, or gate post that carries the load of panels on one side only.
- Line post: a standard intermediate post that carries panels on both sides.
- Blank post: a post with no hardware, used where panels are cut to a custom length.
- Panel: the pre-assembled section that fits between two posts; usually a welded frame with pickets, rails, and optional finials.
- Bracket: the metal angle or collar that bolts the panel to the post; can be cast, stamped, or welded.
- Bracket bolt: a stainless or coated bolt, often with a shear-head design so it cannot be unscrewed from outside the fence.
- Finial: the decorative cap on top of each picket; common styles are spear, ball, or fleur-de-lis.
- Gate frame: a heavier welded frame designed to carry hinges and a latch without sagging.
For tools, a typical residential crew uses a post hole digger or powered auger, a level (a 4-foot level is the most useful single tool), a string line, a tape measure, a wheelbarrow and buckets for concrete, a drill with metal bits, a socket or impact driver for bracket bolts, a rubber mallet, and PPE including gloves, eye protection, and hearing protection when using an auger or demo saw.
Layout, post spacing, and dealing with slope
The layout step is where the design meets the ground. Done well, the rest of the installation is straightforward. Done poorly, every later step has to compensate.
Mark the fence line and post locations
Drive a stake at each end of the fence run, run a taut mason’s line between them, and walk the line to confirm it actually matches the property line and the planned position. Mark each post location with spray paint, leaving the line in place. Standard residential wrought iron panels are commonly 6 feet or 8 feet long, so post centers are usually set on one of those intervals. On a sloped or curved run, expect to shorten some panels, which means ordering or cutting blank sections and adding a blank post in between.
Handle grade changes with racking or stepping
There are two common ways to keep the top of a wrought iron fence looking right when the ground changes elevation, and each has a different cost.
- Racked panels: the panel is pivoted so its top follows the slope while the pickets stay vertical. This works for gentle slopes and for most decorative fences. It is the cleanest visual result.
- Stepped panels: each panel stays level and the fence steps down at every post. This works for steeper grades and for heavy security panels, but it leaves triangular gaps under the low end of each step that may need to be closed off for pets or pool code.
The choice between racked and stepped is usually made when the panels are ordered, because some welded panel designs do not rack at all without stressing the welds. Confirm the racking range with the supplier before the panels ship.
Setting posts so the fence stays straight
Posts carry the entire load, and the alignment of the posts determines whether the fence looks custom-built or slightly off. The steps below are the same ones most residential crews follow.
- Dig each post hole to the depth required by local frost line and to a diameter that gives at least 4 inches of concrete around the post on all sides. For a typical 2-inch square residential post, a 10-inch diameter hole is a common starting point.
- Add 4 to 6 inches of crushed gravel at the base of the hole for drainage, then compact it with the bottom of the post or a tamping rod.
- Set the post in the hole, plumb it on two adjacent faces with a level, and brace it with wooden stakes or post braces so it cannot move while the concrete cures.
- Pour fast-setting fence post concrete to within about 2 inches of grade, then slope the top of the concrete away from the post so water runs off rather than pooling around the base.
- Recheck plumb on every post after the concrete is poured but before it sets, and adjust the braces if the post has drifted.
- Allow the concrete to cure per the bag’s instructions, usually 24 to 48 hours, before hanging panels or applying lateral load.
Two details make a visible difference. First, keep the tops of the posts at a consistent height above the panel; small variations in post height are more obvious than small variations in panel length. Second, on a long run, set the corner, end, and gate posts first, run a string line across their tops, and use that line as the reference for the line posts in between.
| Post type | Typical residential size | Concrete depth (general guidance) | Load carried |
|---|---|---|---|
| Line post | 2 in square, 0.06 in wall | Local frost line, often 30 to 36 in | Panels on both sides |
| Terminal / corner post | 2.5 in square, 0.08 in wall | Local frost line, often 30 to 42 in | Panels on one side, plus lateral load |
| Gate post (walk gate) | 3 in square, 0.10 in wall | Local frost line, often 36 to 42 in | Hinge and latch reaction loads |
| Gate post (drive gate) | 4 in square or 4 in round | Below frost line, often 42 to 48 in | Heavy swing or cantilever gate loads |
Hanging panels, brackets, and gates
Once the posts have cured, the panels go up fast. The job at this stage is to keep the tops level, the brackets tight, and the gates square.
Attaching panels to posts
Most residential wrought iron panels attach with two brackets per side, one near the top rail and one near the bottom rail. Lift the panel onto blocks or have a helper hold it at the right height, slide the brackets into place, and start the bracket bolts by hand to make sure the threads are not cross-threaded. Snug the bolts, recheck level, and then torque them to the supplier’s specification, usually enough to compress the bracket firmly without dimpling the panel. On racked panels, attach the top of one side first, set the rack angle, then attach the top of the other side and work down.
Hanging a walk gate so it actually closes
Gates fail more often than panels, and most gate failures come from posts that lean or hinges that are undersized for the gate’s weight. Three habits prevent the usual problems.
- Use the gate post, not a line post, at every gate location, even for a 3-foot walk gate. The added mass of the post and the deeper footing keep the hinge side from sagging over time.
- Set the hinge side plumb in both directions, not just front-to-back. A post that is plumb on the face of the fence but leaning along the line of the fence will pull the gate out of square within a season.
- Specify self-closing hinges and a self-latching mechanism for any pool or pet fence. The hardware adds a small cost and saves a recurring argument about whether the gate was left open.
Driveway gates and automation
A driveway gate in a wrought iron fence is a separate piece of equipment. The post foundations are deeper, the gate frame is heavier, and the operator (the motor and arm or rack that moves the gate) is sized to the gate’s weight and length. If automation is planned, the gate posts, the power conduit, and the safety devices (photo eyes, edge sensors, and a manual release) should be designed in from the layout step, not added after the concrete has cured. Local code typically requires a separate electrical permit for the operator circuit and a final inspection.
Finishes, corrosion, and what to do about rust
Finish is the single biggest variable in how a wrought iron fence installation looks five, ten, and twenty years after it goes in. Three systems cover almost every residential job.
| Finish system | How it is applied | Typical service life on steel | Trade-offs |
|---|---|---|---|
| Hot-dip galvanizing under paint | Steel is dipped in molten zinc, then primed and top-coated | 20+ years with periodic topcoat renewal | Highest upfront cost, lowest lifetime maintenance |
| Zinc-rich primer + exterior topcoat | Sprayed or brushed primer, then oil or acrylic enamel topcoat | 8 to 15 years depending on climate and prep | Common residential choice; can be field-repaired |
| Powder coat over galvanized or primed steel | Electrostatic powder, oven-cured | 10 to 20 years | Durable, but field touch-ups are harder to blend |
Field-applied paint over a primed surface is the most repairable system, which is why it is common on residential jobs where the homeowner expects to do a little upkeep. Powder coat looks excellent out of the box and is hard to beat for color consistency, but a chip on a powder-coated panel needs careful sanding, zinc-rich primer, and a matched topcoat to prevent the chip from becoming a rust line. Galvanizing under any paint system is the strongest combination in wet, coastal, or road-salt environments.
What to do when rust shows up
Rust on a wrought iron fence is not a sign that the fence has failed; it is a sign that the finish needs attention. The repair pattern is the same at any age.
- Scrape or sand the rust back to clean, bright metal. A wire wheel on a drill or a flap disc on an angle grinder makes quick work of it.
- Wipe the area with a clean rag and a mild solvent to remove dust and any chalky residue from the surrounding paint.
- Spot prime with a zinc-rich or rust-inhibiting metal primer, feathering the edge into the existing finish.
- Topcoat with a matching exterior enamel, brushing or rolling rather than spraying for a homeowner repair.
The temptation to paint over surface rust without scraping is the most common reason a “rust spot” comes back in the same place within a year. Rust is volume-expansive, so paint over rust simply pushes the rust off and the spot returns larger.
Costs, timelines, and what affects both
Because prices vary by region, supplier, and site conditions, it is more useful to talk about the drivers of cost and time than to publish a single number. The list below is the order in which they usually affect a residential quote.
- Linear footage and panel height: the largest cost driver; taller and heavier panels cost more per foot and often require larger posts.
- Number of gates: each gate is a custom welded assembly with its own hardware, and a driveway gate with an operator is a separate line item entirely.
- Site conditions: rock, roots, and high water tables slow digging and may require a different footing; significant slope adds layout and racking time.
- Finish system: the spread between field-applied paint and galvanized-plus-paint is meaningful; it shows up as much in the warranty as in the invoice.
- Demolition and removal of an existing fence, if any, including concrete footings left in the ground.
- Permit and inspection fees set by the local jurisdiction.
For a typical single-family home, a straightforward decorative wrought iron fence installation along 80 to 150 linear feet with one or two walk gates is often completed by a two-person crew in two to four working days, plus concrete cure time if gates are hung immediately. Larger or more complex projects take correspondingly longer. Homeowners who want a useful budget range should ask local fence contractors for a written quote that breaks out materials, labor, finish, gates, and any site work, rather than a single lump sum.
DIY versus hiring a fence contractor
Wrought iron fence installation is one of the few fence types where the panels are essentially pre-engineered, so the on-site work is more about alignment and post-setting than about fabrication. That makes it more accessible to an experienced DIYer than, say, a masonry wall, but the weight of the panels and the precision required for gates still push most homeowners toward hiring a crew.
| Approach | Where it tends to work well | Where it tends to struggle |
|---|---|---|
| Full DIY | Short, straight runs on level ground with off-the-shelf panels and one simple walk gate | Slope changes, custom widths, masonry or stone pillars, any driveway gate |
| Hybrid (DIY layout and posts, contractor panels and gates) | Homeowners with time and access to an auger who want to control post alignment themselves | Projects where the contractor’s warranty depends on installing the whole system |
| Full contractor install | Any project with multiple gates, slope, or non-standard panel widths, and any project with a permit and inspection | Tight budgets, or homeowners who specifically want to control every detail themselves |
A practical middle path is to ask a contractor to do the layout and post-setting on a time-and-materials basis, then hang the panels and gates yourself once the concrete has cured. This captures the most failure-prone parts of the job in professional hands while letting you save labor on the parts that are more about patience than skill.
Maintenance that actually extends fence life
Wrought iron fence installation is not a “set it and forget it” project, but the maintenance is simple and infrequent.
- Annual rinse with a garden hose to remove road dust, lawn clippings, and any fertilizer splash that can hold moisture against the finish.
- Visual scan for chips, especially at the base of posts where lawn equipment tends to throw grass, and along the bottom rail where water collects.
- Touch-up paint on any chip within a season; small chips become rust streaks, and rust streaks become pitted metal.
- Hinge and latch check once a year: tighten set screws, oil moving parts with a dry silicone or graphite lubricant (not WD-40, which attracts dust and eventually gums up), and confirm self-closers still close fully.
- Vegetation control along the fence line so vines and shrubs do not trap moisture against the metal and so root growth does not push posts out of plumb.
A homeowner who follows that list on a wrought iron fence installation with a quality finish will typically see 20 years of service before any major refinishing is needed, and a galvanized-and-painted system can go considerably longer.
Common mistakes that show up after the crew leaves
Most installation problems are visible within the first season, and most are caused by one of a handful of oversights.
- Posts set above the frost line in cold climates heave during freeze-thaw cycles, and the fence slowly leans out of plumb. Local building code gives the required depth; treat it as a minimum.
- Panels racked beyond their design range stress the welds at the rail-to-picket joints and crack the finish at the high point of the rack.
- Gate posts undersized for the gate weight sag visibly within a year and pull the latch out of alignment.
- Concrete crowned toward the post at grade holds water against the post base and accelerates corrosion at exactly the spot that is hardest to refinish.
- Finish scratched during installation and never touched up, leaving a bare metal line that rusts in the first wet season.
A short walk-through of the finished fence with the installer, where each of those points is checked before final payment, prevents most of them. The fix is much cheaper during the walk-through than during the first anniversary.
Frequently asked questions
How long does a typical wrought iron fence installation take?
For a residential property with 80 to 150 linear feet, a two-person crew usually needs two to four working days for layout, post-setting, panel hanging, and gate installation, plus a day or two of cure time for the post concrete if gates are hung right away. Larger or more complex projects take longer, and any automation on a driveway gate adds time for the electrical and low-voltage work.
Do I need a permit for a wrought iron fence installation?
Many jurisdictions require a permit for fences over a certain height, for fences within a sight-triangle at a corner, and for any fence that encloses a pool. Historic districts and HOAs often have their own approval step. A call to the local planning or building department before the project starts confirms the exact rules that apply to the property.
What is the difference between wrought iron and mild steel fencing?
True historical wrought iron is an iron alloy with very low carbon and fibrous slag inclusions, made in a charcoal or coke hearth. It is no longer produced on a commercial scale. Most modern “wrought iron” fences and gates are made of mild steel that is shaped, welded, and finished to resemble the older material. The visible look, the joining methods, and the long-term maintenance are very similar.
How deep should fence posts be set?
Posts are typically set below the local frost line, with 30 to 36 inches being common in many regions and deeper in colder climates. Gate posts, especially those carrying a heavy swing or automated driveway gate, are usually set deeper than line posts and in larger-diameter concrete footings. Local code is the source of truth for the exact depth on a given property.
What is the best finish for a wrought iron fence?
For most residential projects, a zinc-rich primer under an exterior enamel topcoat gives a good balance of durability and field-repairability. In wet, coastal, or road-salt environments, hot-dip galvanizing under a topcoat is more durable. Powder coat over a primed or galvanized substrate is also a strong option, but field touch-ups are harder to blend invisibly.
Can a wrought iron fence be installed on a slope?
Yes, either by racking the panels so the top follows the slope while the pickets stay vertical, or by stepping the panels so each section stays level and the fence steps down at each post. Racking works best for gentle slopes and for panels that are designed to rack. Stepping is used for steeper grades and for heavy security panels, but it can leave triangular gaps under the low end of each step that may need to be closed off for pets or pool code.
How do I keep a wrought iron fence from rusting?
Keep the finish intact, keep the base of the posts free of vegetation and standing water, and touch up any chips with a zinc-rich primer and a matching topcoat as soon as they appear. An annual rinse with a garden hose removes the dust and fertilizer splash that hold moisture against the metal, and a quick visual scan catches small problems before they become pitted rust.
What should I look for when hiring a fence contractor?
Look for a written quote that breaks out materials, labor, finish, gates, and any site work, a clear warranty on both the product and the installation, evidence of insurance and any required local licensing, and references on similar projects. Ask to see a sample panel in the chosen finish and, if possible, an installed job in the same neighborhood so you can see how the finish has held up.





Leave a Reply